A Lego Technic replica of the warthog from Halo licence, featured drive, steering, suspensions, lockable differential, turret and opening element.

How to build ?
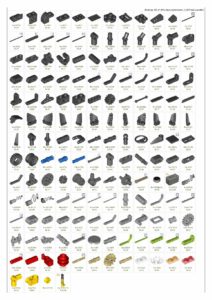
You only need the parts and the instructions. You can purchase the PDF instructions on this shop which contains the partlist at the end (no parts included), and you can check on ![]() Rebrickable or in the instructions preview below (partlist for M12B without turret).
Rebrickable or in the instructions preview below (partlist for M12B without turret).


Halo Warthog M12
If you do not have the parts, you can purchase the complete kit from retailers :
- Using Genuine LEGO Parts : Have a look to my creator page on Buildamoc or if not available, request a custom quote from them.
- Using non-Genuine LEGO Parts : This model is available on LesDiy Store in a complete package, including the parts (alternative bricks from China) and the PDF Instructions.
Context
Some month ago, I have bought 8 xerion’s tires on bricklink, in order to make big scaled vehicule. I have started to use with a 8×8 exploration vehicule, but finally make a space lunar rover, and then reuse the tires from an other project : a warhtog from halo license.

The drive is operated by two XL motor with differential on each axle. Each motor is connected to one axle. Thanks to the all wheel steering, there is no need to have a central differential. The drivetrain is different than other supercar because of the space between the suspensions. Consequently I use standard portal hub with 8/24 gearing reduction and two iscolating bevel gear for the fixation in the chassis. It explain why the differential is not located between the suspensions.

The differential can be locked using a M motor with drives a lever and connecting rod which push and pull a lever connected to the changeover catch of the differential. This solutions is pretty handy because of the space integration in the chassis but also because it is well playable when the wheel slip.

The suspension are made with independent double wishbone suspensions like on the Warthog in Halo 4 but not as the previous with oscillating longitudinal suspension. Even if it would have not been enough rigid to enable correct driving.

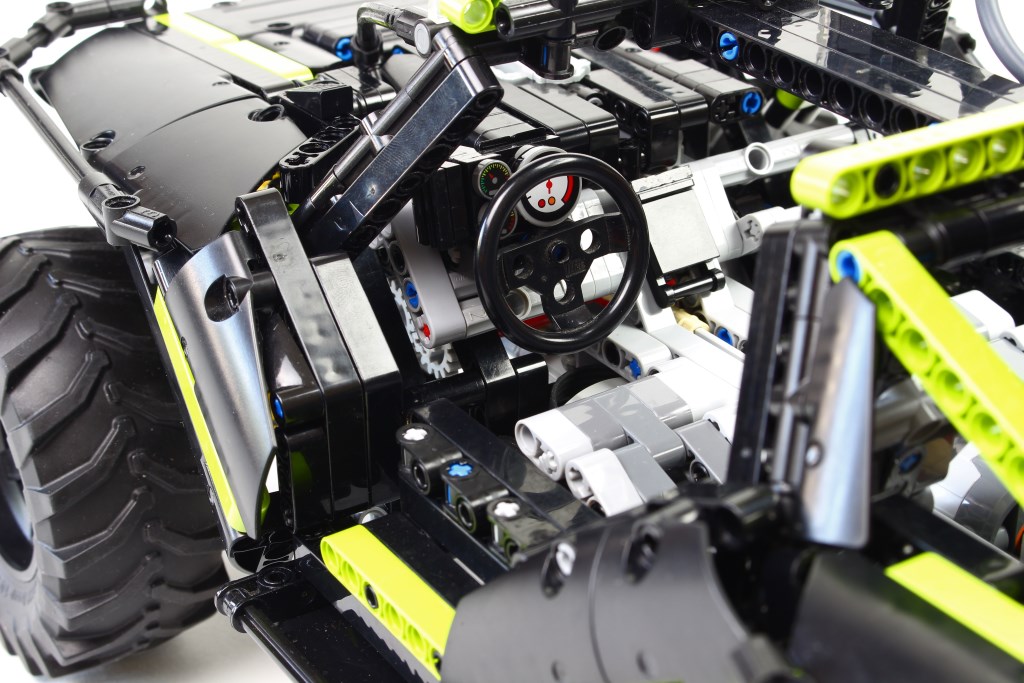
The steering is operated by a servo-motor located between the seats, and operates the two axles thank to 16/16 gearing and rack and pinion. It ensures a good turning radius and no need for a central differential. The steering wheel is not connected to the steering due two the lack of space because of the bodywork.
Some words about the bodywork. I have tried to reproduce the complex shape of the bodywork, including the hood, mudguard, roof and particular shape of the side panel with multiple orientation. At final, I am pretty happy of the solutions because of design but also because the fixations are solid. The warthog can be easily take by the roof without taken apart.

Regarding the opening parts. The hood can be opened to show the hydrogen engine (no fake engine from Lego) and behind a other panel to show the LiPo battery. At the rear, the trunk can be opened to show the IR receiver, turret and there are also small jerrycan which can be removed. Note that the trunk is locked in position using towballs.

To finish with the turret, it is operated by a M motor located inside, the triple can is moved in rotation and the movement is also transfer underneath with a worm gearing (1/8) which drives a lever and connecting rod, attached to a lever with 24t gearing on the turntable. Thanks to that, when the turret is operated, the canon rotates but the turret also oscillate from left to right.
Or course the interior is also equipped with seat and dashboard in order to fit with the original one. Regarding the color scheme, I have chosen to make it black (even if the “real” warthog is dark green) with some addition of lime on panel. You can easily changed these parts for any other color (orange, blue and so on.).


Building Instructions

With the help of ForelockMocs, he create the instructions, based on a modified version without machine gun, hook and red jerrycan and adding other details such as light and openable trunk. The instructions are 314 pages, step by step high resolution computer generated instructions with partlist, color coded cable with layout, flexible parts, in the same way as official Lego one. Please note this model is not suitable for truck trial due to its weight.
Regarding the bill of material, they are includes in the instructions, you can watch here or you can also checked the exact bill of material on Rebrickable and export in whatever format you want :
![]() Want to know if you can build the Warthog (no machine gun) ? The model has been indexed to rebrickable, check it ! (soon available)
Want to know if you can build the Warthog (no machine gun) ? The model has been indexed to rebrickable, check it ! (soon available)
You can buy the instructions with the following button for 10€ excluding tax. You can also buy other building instructions and get an automated discount, you will get 15% off for 2 PDF, and 20% off for 3 PDF on the total). The automated discount is available for all the instructions for sale on nico71.fr.
See it on the shop (no-machine gun)
Halo Warthog M12
After your payment, you will be redirected to a page for downloading your instructions, and will receive also the link to download by email. Please check the spam box and be patient to receive it. If you have trouble to download your copy of the PDF after payment or open the document, do not make a paypal dispute, please contact me using the contact form. The link to download the instructions expires within 48h. Contact me if you have lost your instructions. Note that you can print it, but not copy or distribute. Thank you for supporting my work 🙂


Free Photo-Sequence
I have also made a photo sequence of dismantling the militarized version as shown on the picture. You can download for free here : LegoWarthoginstructions.pdf / Dedicated Partlist (rebrickable)


(9) Comments
Hello, thank you for building the warthog, yes the transmission and steering are quite fragile, it is not made for rough surface or trial truck, because of the weigh. You can try to reinforce the transmission or the steering but I do not think it is possible to reach the offoad abilities of a lego trial truck.
Hello! Congratulations on this model!
I very much liked the detail and complexity of the build. I wanted to build this machine since the first time I saw it, and after waiting for several part orders I was finally able to start (a multi-color version of the vehicle).
Building by photos was quite a challenge, but I finally made it! 🙂 My kids liked shooting the gun and actually the warthog can be a toy for two – one on the gun and one on the wheel.
I was surprised, however, that, at least in my build, the steering is very fragile – the 1×6 links or the ball pins disconnect at almost the smallest obstacle the wheel meets. Have I missed something? It seems like a tougher version of the steering is needed.
Also, the fragile steering and the engines without reductors make the locking diffs somewhat pointless. I am still to test the vehicle outdoors, but the warthog has hard time going through, for example, a sandal. It either stucks and neither wheel moves, or a pin says “clack” and flies away.
I will try to figure out something, although I am pretty sure you’re way better than me in this.
Best Regards,
Vasil
Hi,
First, congratulation for a really great MOC: I wish I could achieve the same level of refinement!!!
I built it first with parts of multiple colors (waiting for orders to arrive with black and lime parts… and I’ll redo it again 🙂 ) and I noticed few things :
– few pictures are difficult to ‘read’ and sometimes the order is more adequate to dismantling than to mounting the kit. For instance, pictures from page 50 to 52 should probably come at page 46, before the second side of the structure is installed.
– my main difficulty surprisingly came with the top part of the machine gun: difficult to guess the assembly there, and one more picture could do the job.
– the 1×6 links should be without stoppers (2739a) since the articulation comes from the bottom at one end and from the top at the other end: the inventory in rebrickable mentions model 2739b with stoppers.
– the “Axle and Pin Connector Hub with 2 Perpendicular Axles” (10197) are mentionned in the inventory as dark grey: they also exist in black, and would suit better here since they are visible.
– the last step of adding bars on the side of the back pannels is not obvious: I missed it and I then realized once I compared my result with the picture. Here again, one mode picture may help.
I am ready to help with picture in case it may help you improving further the biulding instructions: once again, this model is great and it deserves a top quality documentation !!!
Best regards,
Thierry
Hello, sorry for the Ads inconvenience, I will try to remove this ads which mislead the user. For the building instruction, indead I have not uplaoded the instruction PDF ! only the viewer. I will correct this today. Many thanks.
Hello Nico,
sorry vut I can’t find a link to download the instructions for this great Model. Only links to company which will installed any things to my browser. Where can I find the Pdf File ?
Your Models are super !!!
Kind Regards from Germany
HJvdH
Bonjour, Merci pour ton commentaire. Hélas oui comme la notice est prise en démontage ça occasionne des problèmes pour le remontage parfois, surtout lors de gros assemblage. J’en suis bien navré mais c’est le seul moyen que j’ai sinon je dois tout démonter et remonter dans l’ordre et ça prend vraiment trop de temps, temps que je préfère investir pour construire des choses. N’abandonne pas, la construction du warthog est très propre, quand tu auras fini le châssis, le reste c’est du détail, bon courage 🙂
La réalisation est superbe mais franchement la séquence photos pour le monter est imbuvable… On a du mal à suivre les instructions et on passe son temps à faire/défaire puis refaire à nouveau. C’est au final long et fastidieux. J’en suis qu’à la moitié et j’y ai passé déjà plusieurs heures ! Je loue ton travail mais je crois que je vais abandonner.
Merci en tout cas d’avoir proposé ces instructions, j’avais un peu de temps mais je pensais pas y consacrer tellement et je pourrai pas le finir. Tant pis pour moi ! Encore bravo en tout cas, c’est encore une superbe oeuvre de ta part !!
Merci pour ton commentaire. Sur les photos, je n’ai pas fais de correction précise mais il y certaine photo sous ou surexposé par contre sur mon écran photo calibré, cela reste lisible, peut être ton contraste et trop ou pas assez élevé sur ton moniteur ? Pour le montage, comme c’est une notice de démontage remis à l’endroit, ça occasionne certain passage ardue. J’espère quand même que tu as apprécié le montage.
c’est toujours avec beaucoup de plaisir que je fais tes Mocs. n’étant pas du tout amateur d’engins guerriers je veux tout de même te féliciter pour cet engin au point de vue technique. malheureusement avec la correction de contraste des photos les axes grises sont devenues pratiquement invisibles. ensuite les pieces des fotos page 51 devraient plutot etre montées page 37 et page 52 l’engrenage pour la direction est pratiquement invisible autant pour les corrections
meilleures salutations amicales du Luxemboug Robert
Comments are closed.