A Lego Technic steam machine powered by two pneumatic cylinders engine, with valve gear mechanism, speed indicator, air control valve and building instructions.
How to build ?
You only need the parts and the instructions. You can purchase the PDF instructions on this shop which contains the partlist at the end, and you can check on Rebrickable or in the instructions preview below.
Steam Machine (Pneumatic)
If you do not have the parts, you can purchase the complete kit from retailers :
- Using Genuine LEGO Parts : This model is available at Buildamoc, in a complete package including LEGO Genuine Parts and PDF instructions. (Air Source Not Included, see below the requirements)
- Using non-Genuine LEGO Parts : This model is available on LesDiy Store in a complete package, including parts (alternative bricks from China) and PDF Instructions. (Air Source Included : 4-pump in handpump)
Context
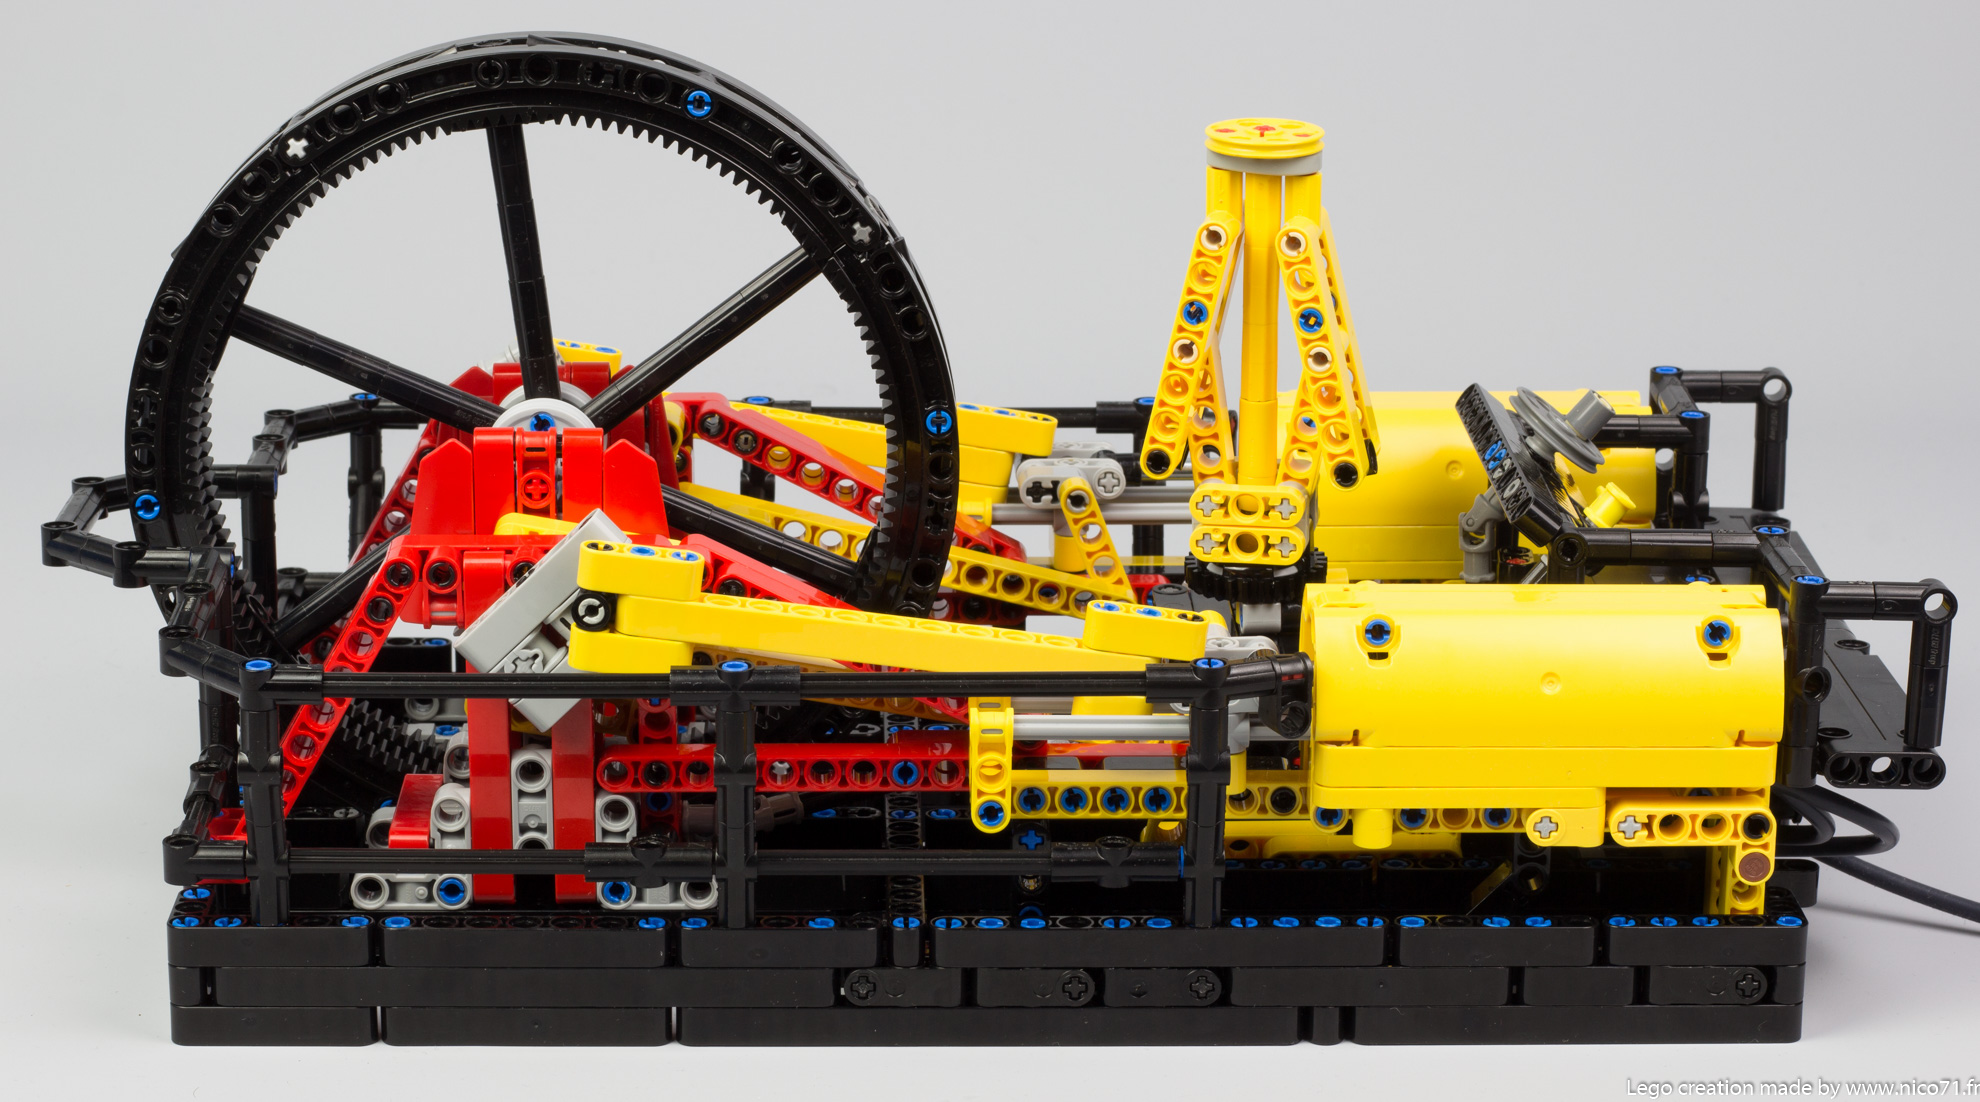
Since my last pneumatic mine, I wanted to build a Lego pneumatic engine with the new cylinders which are bigger. At the beginning, I wanted to build a Steam Traction Engine or a Locomotive to focus on the valve gear, but I wanted to use the new gear rack from the 42082 as the flywheel, nevertheless it was complicated to implement due to the scale. That is why I focused the work on the big steam machine like the mill steam machine which have a big flywheel at the center.

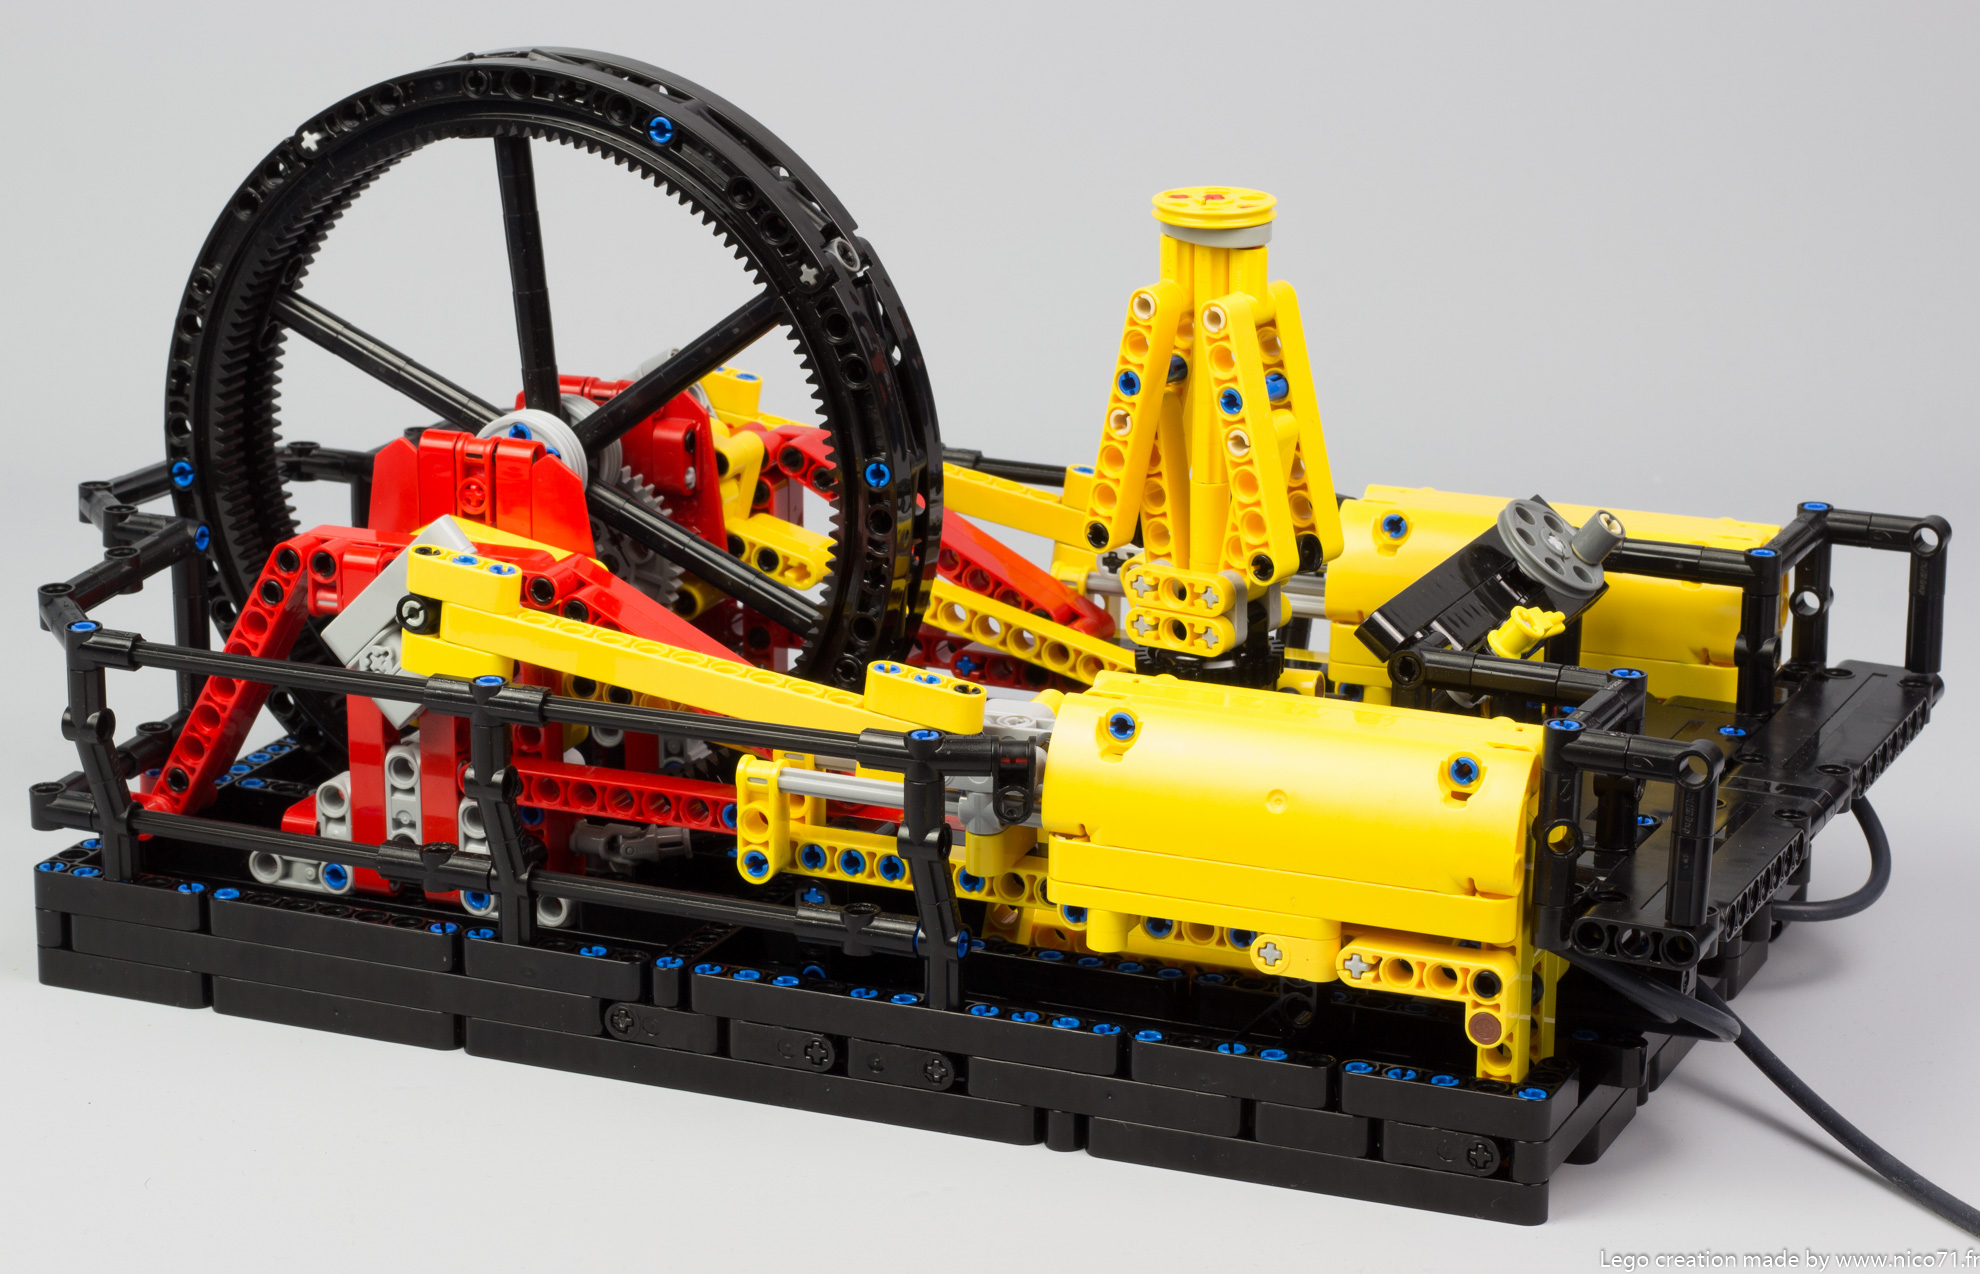
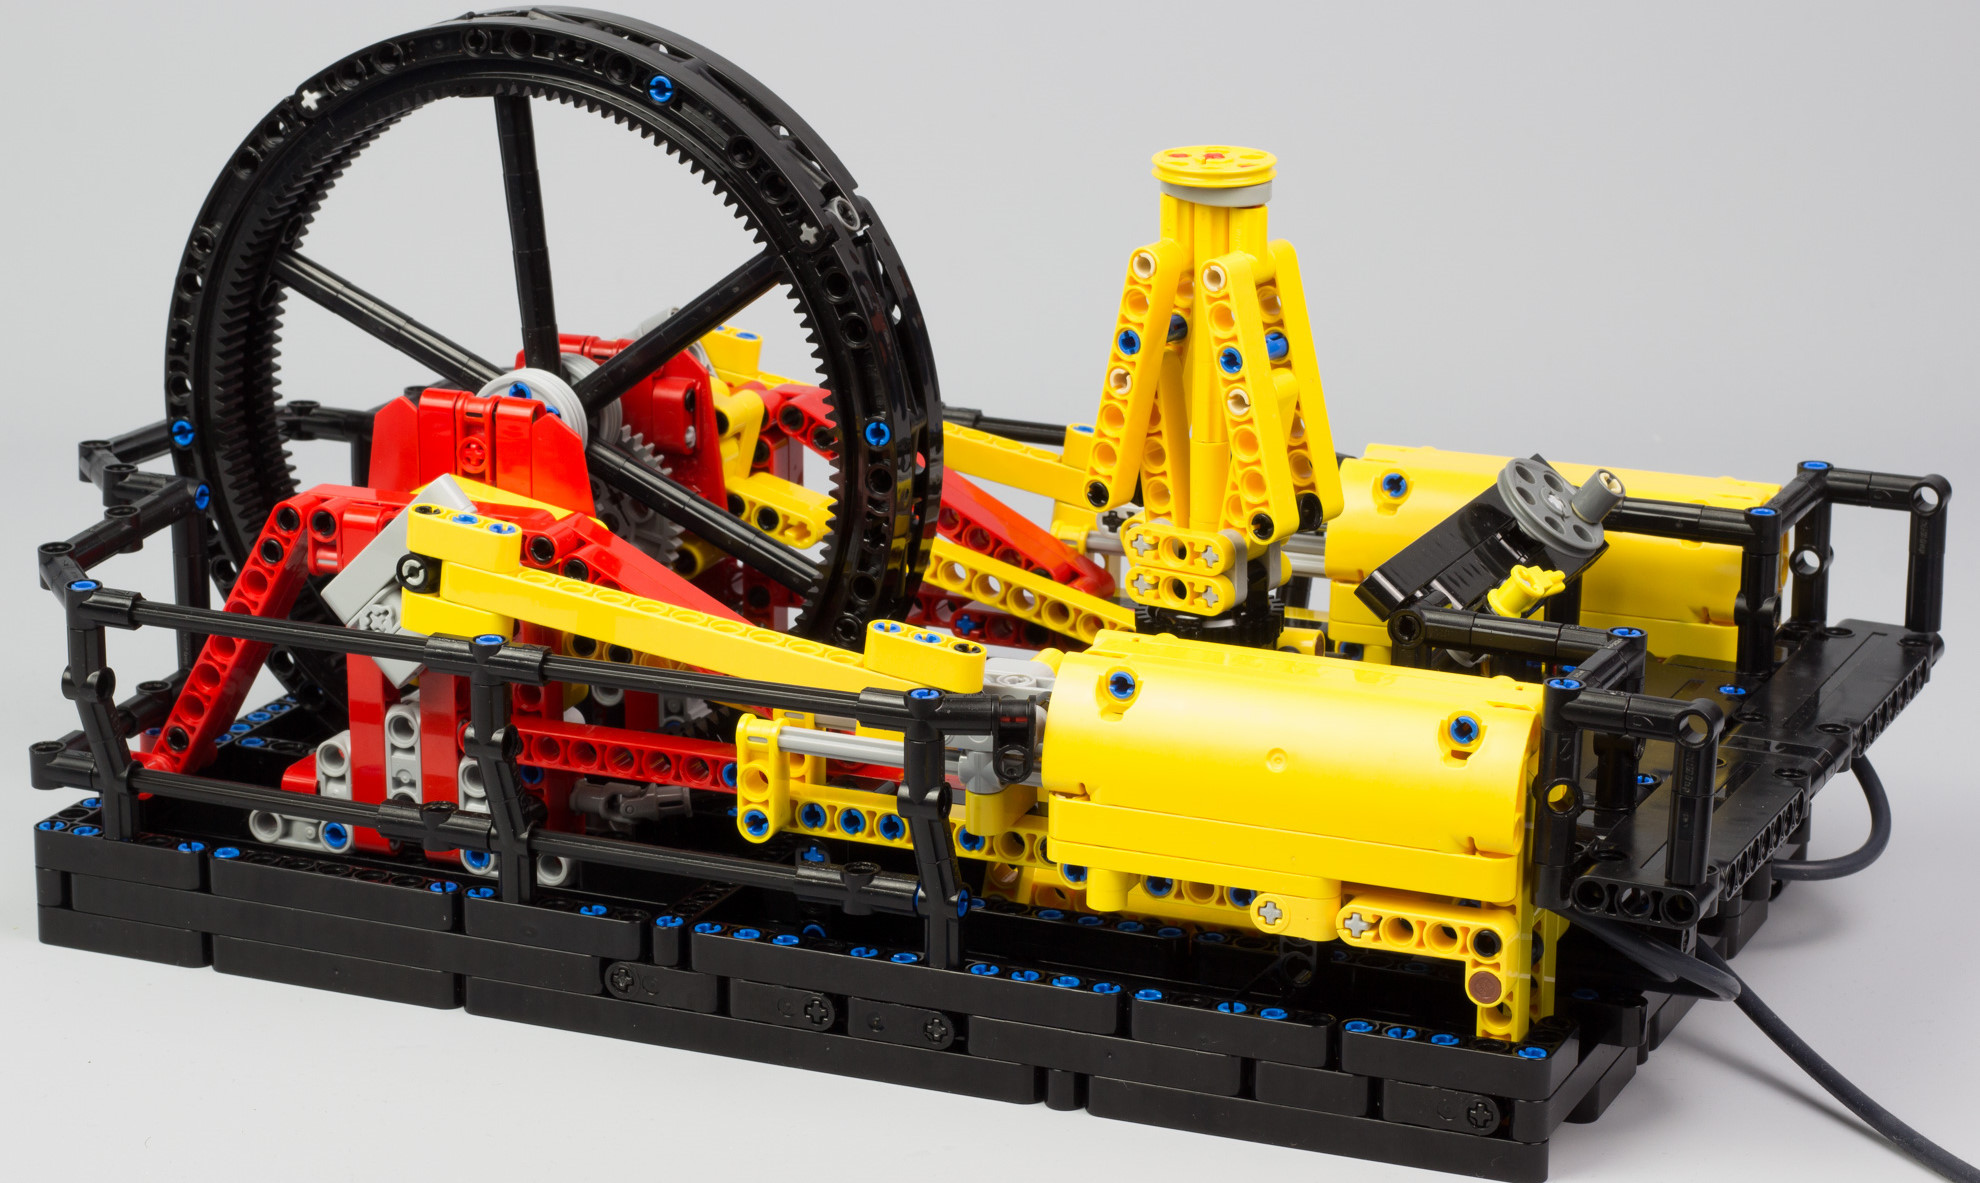
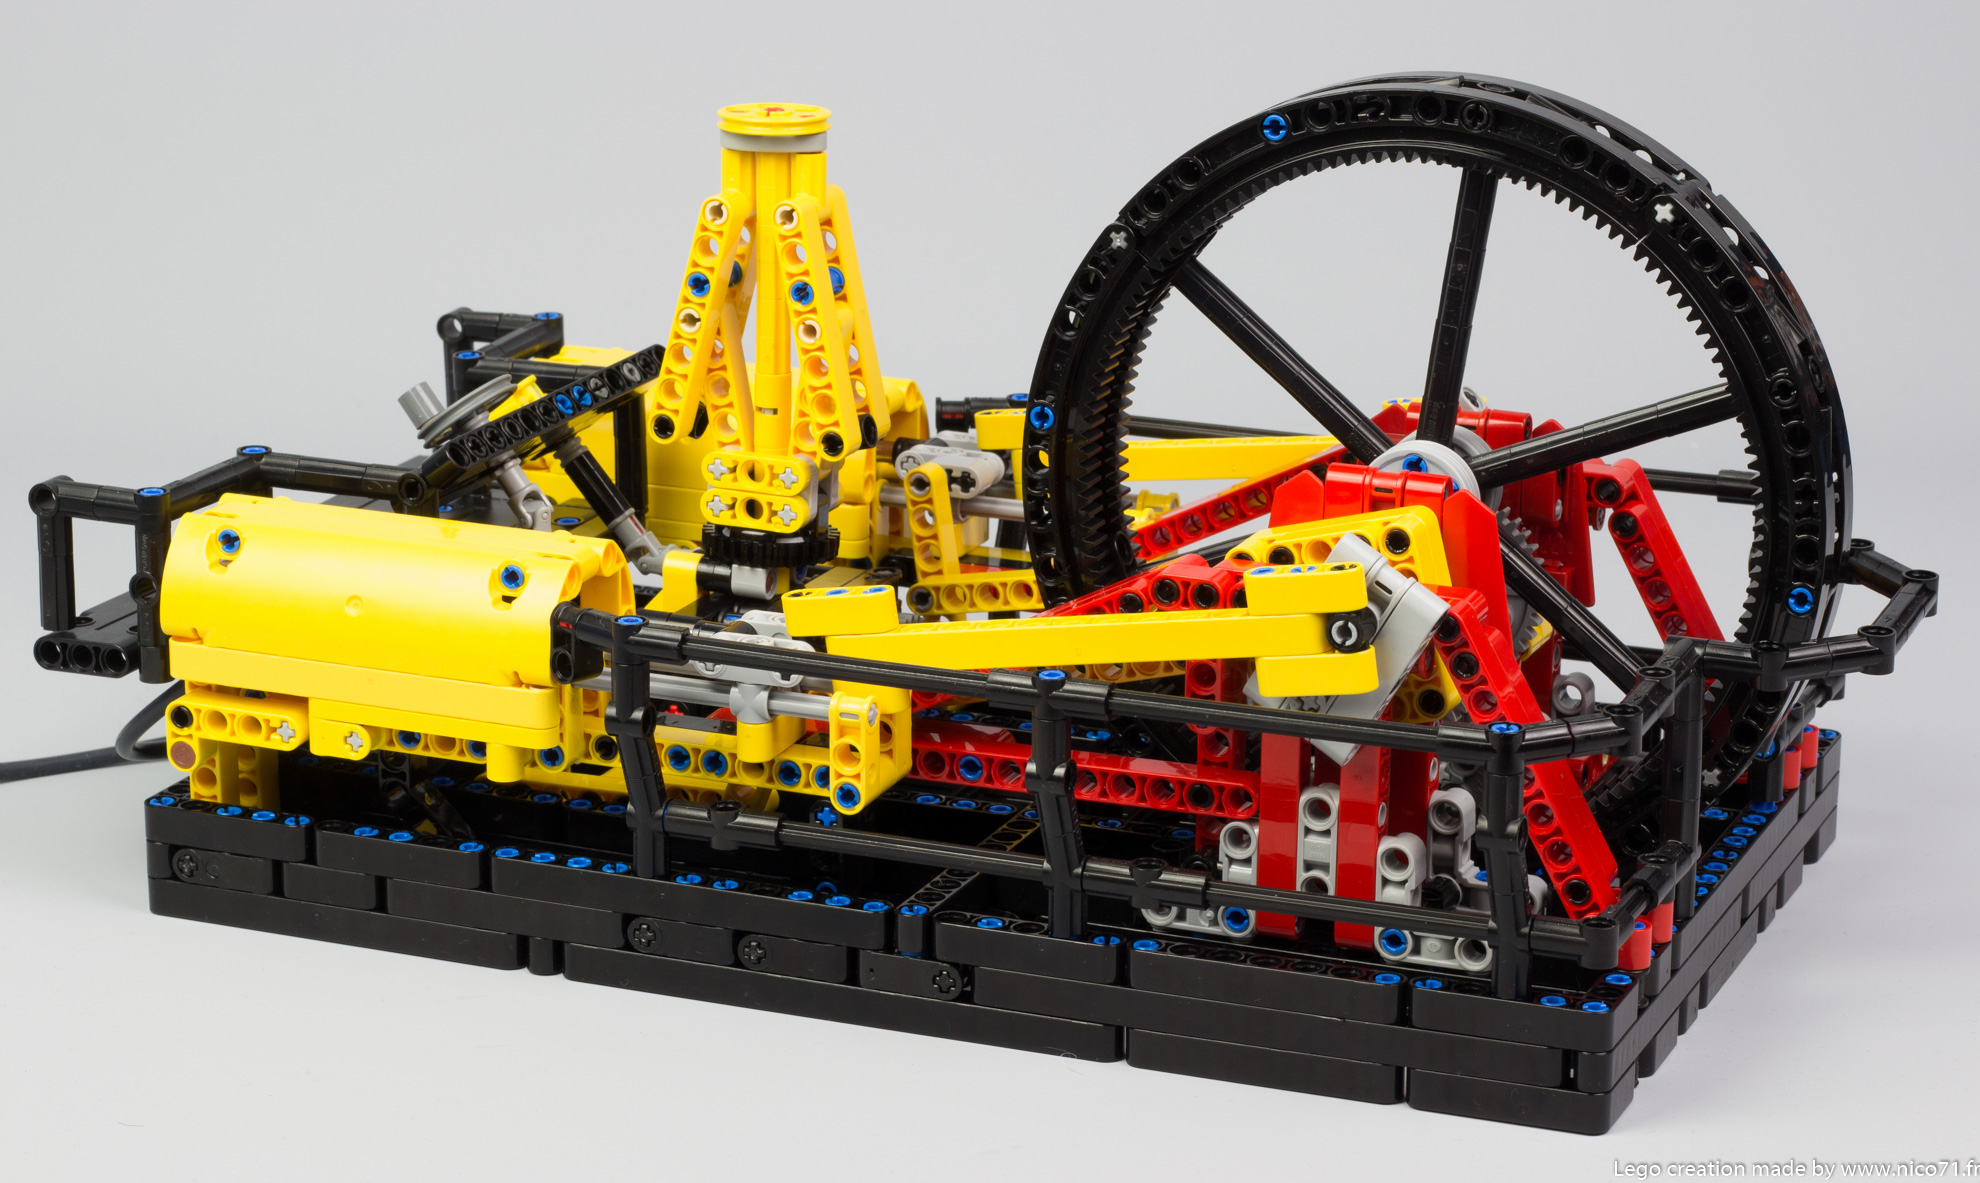
Functioning
This machine is composed of a chassis, two pneumatic engines with valve gear, a flywheel which connects the both engines, a speed indicator display thanks to a governor and an air control valve. The valve gear is inspired by one on the locomotive but without the reverse mode. It enables to reduce the dead point on the switch and maximize the time on left or right position which increases the efficiency of the engine. It is composed of a main crank and connecting rod to the cylinder, plus a second crank which has a angular offset also connected to the piston rod with a linkage system which connects the both to the switch. This combination of the two cranks and linkage system enable to have a non-linear motion (you can see it on the video, the switch seems to jump from left to right and so forth).

The two engines are symmetrical, and are totally independent. The machine can work with only one cylinder or two, the flywheel connected the right engine to the left, using a gear multiplication of 5:1, it enables also to create a angular offset of about 90° between the two cylinders, which helps to make start the engine in any case (but create some vibration). Please note also that either the pneumatic cylinder, either the switches are not modified.
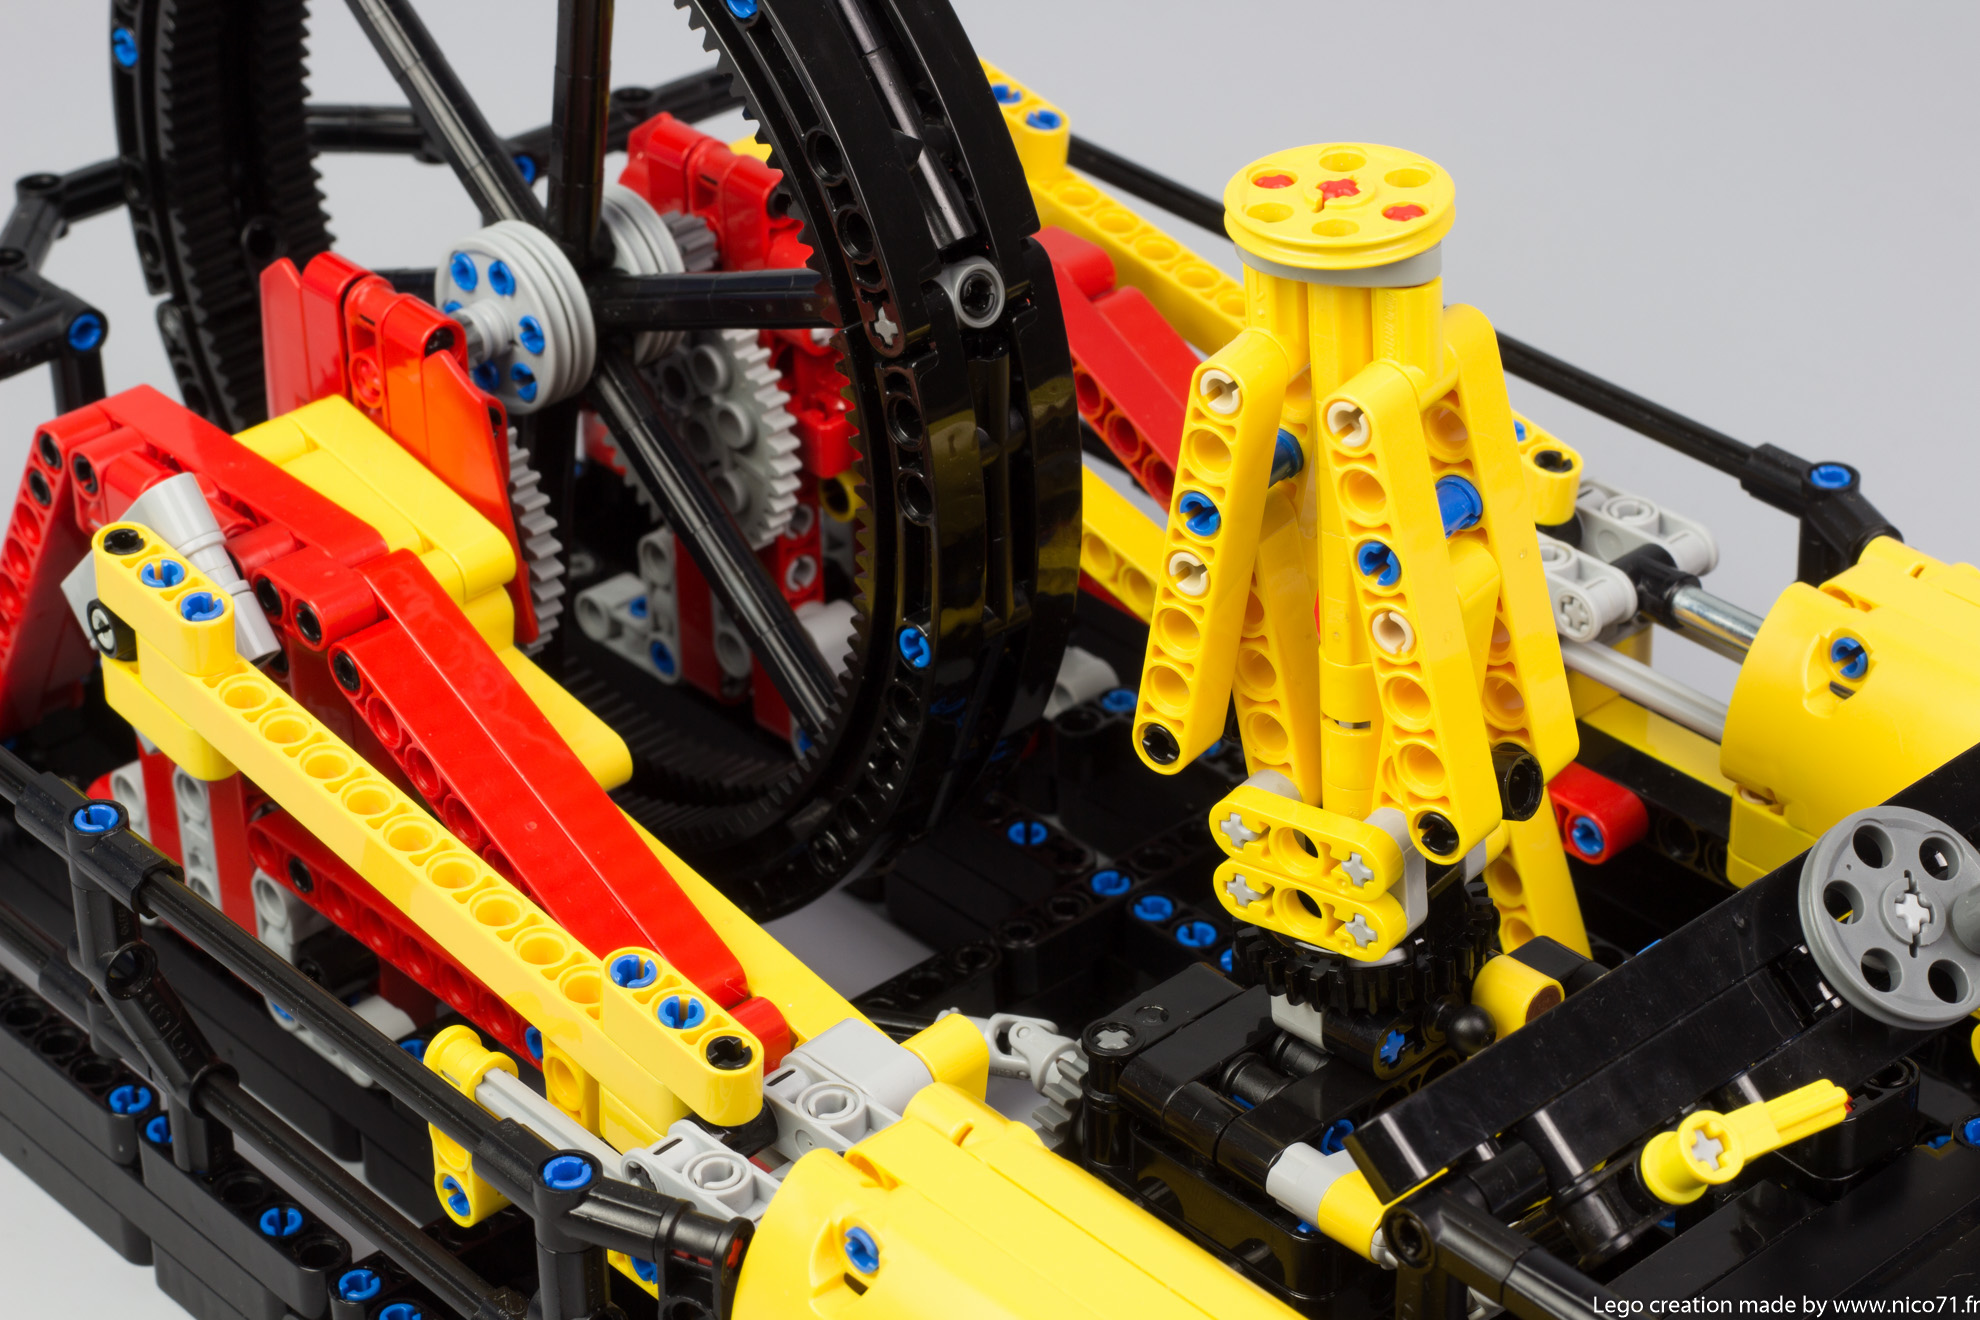
The speed indicator uses the same principle has on my old centrifugal tachometer. It is connected the the left engine, and the rotation speed raises the two arms which pull a lever which makes rotate the indicator. Of course this system do not regulate the air flow. Because in Lego, it doesn’t exist a proper valve, the only way it to pinch the hose which requires lot of force, force that can not be provided by small plastic arms which rotate. Maybe it is possible to make at a bigger scale and with a very soft hose.
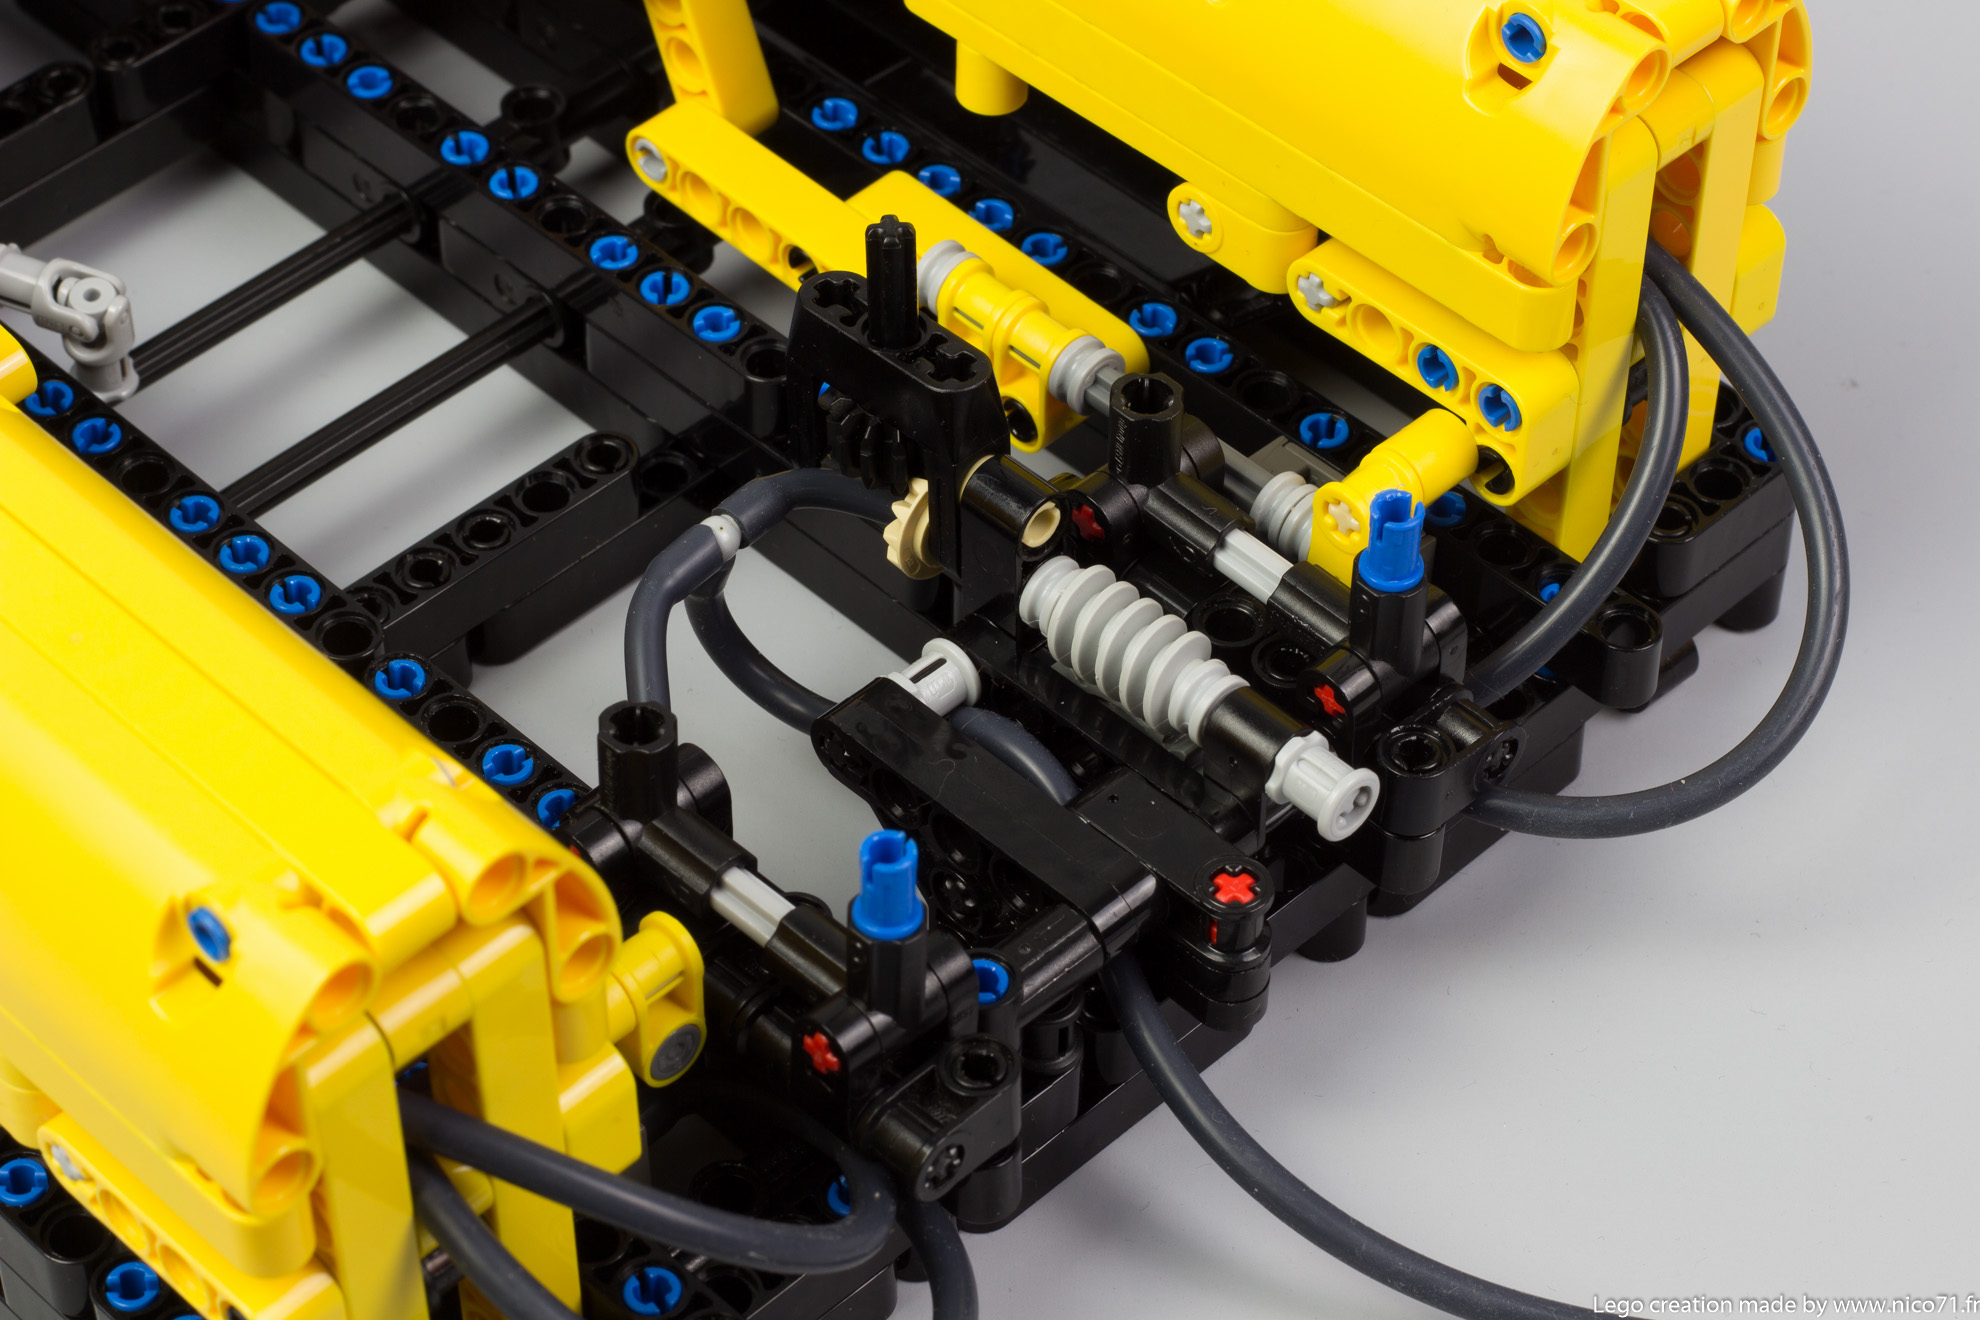
The last equipment is the air control valve which is operated by the handle. It drives a worm screw on a 24t gear, with a small lever which pinches the hose. By modifying its section, the air flow is controlled, from totally closed to totally open to adjust the speed.
Design
I wanted to make a working engine but also a nice detailed one. That is why I have chosen a color scheme for visual description, with yellow for pneumatic and moving parts, red for the engine chassis, and black for the rest. I have made also some details like the working area on a platform with the controls, and fences. At final, I find that the engine work smooth thanks to the big flywheel and the valve gears, and is very didactic and nice to see for people who like kinetic sculpture, that is why I have made a building instructions.
Pictures and Video


How to build ?
You only need the parts and the instructions. You can purchase the PDF instructions on this shop which contains the partlist at the end, and you can check on Rebrickable or in the instructions preview below.
Steam Machine (Pneumatic)
If you do not have the parts, you can purchase the complete kit from retailers :
- Using Genuine LEGO Parts : This model is available at Buildamoc, in a complete package including LEGO Genuine Parts and PDF instructions. (Air Source Not Included, see below the requirements)
- Using non-Genuine LEGO Parts : This model is available on LesDiy Store in a complete package, including parts (alternative bricks from China) and PDF Instructions. (Air Source Included : 4-pump in handpump)
Please note that the pro-building instructions is included in the whole package but you will need to have you own source or air (3 bar / 40psi) for the Genuine LEGO kits. You can use :
- 4x pump lego like this one
- Use a lego compressor according to the specs
- Use a electrical compressor like automotive compressor, industrial or electrical pump, you will need to put the air in the lego hose with . You can use a ball needle.
- Use a hand pump with ball needle.
Please note that the color of the hose can vary, you only need to respect where each hose is connected and have to cut it if they are delivered in one piece.
You can buy the instructions with the following button for 10€. You can also buy other building instructions and get an automated discount. You will get 15% off for 2 PDF, and 20% off for 3 PDF on the total), available for all the instructions for sale on nico71.fr.