A Lego Technic Balance Clock with Korfhage differential powered remontoire, with building instructions.
If you have already the parts : you can purchase the PDF instructions only on this page and build it with your LEGO parts. The instruction contains the partlist at the end, and you can check individually on Rebrickable, or in the instructions previews below.
If you do not have the parts, you can purchase the complete kit from two different retailers :
- Using Genuine LEGO Parts : This model is available on Buildamoc in a complete package including genuine LEGO parts plus the PDF instructions.
- Using non-Genuine LEGO Parts : This model is available on LesDiy Store in a complete package, including the parts (alternative bricks from China) and the PDF Instructions.
Direct purchase of the instructions
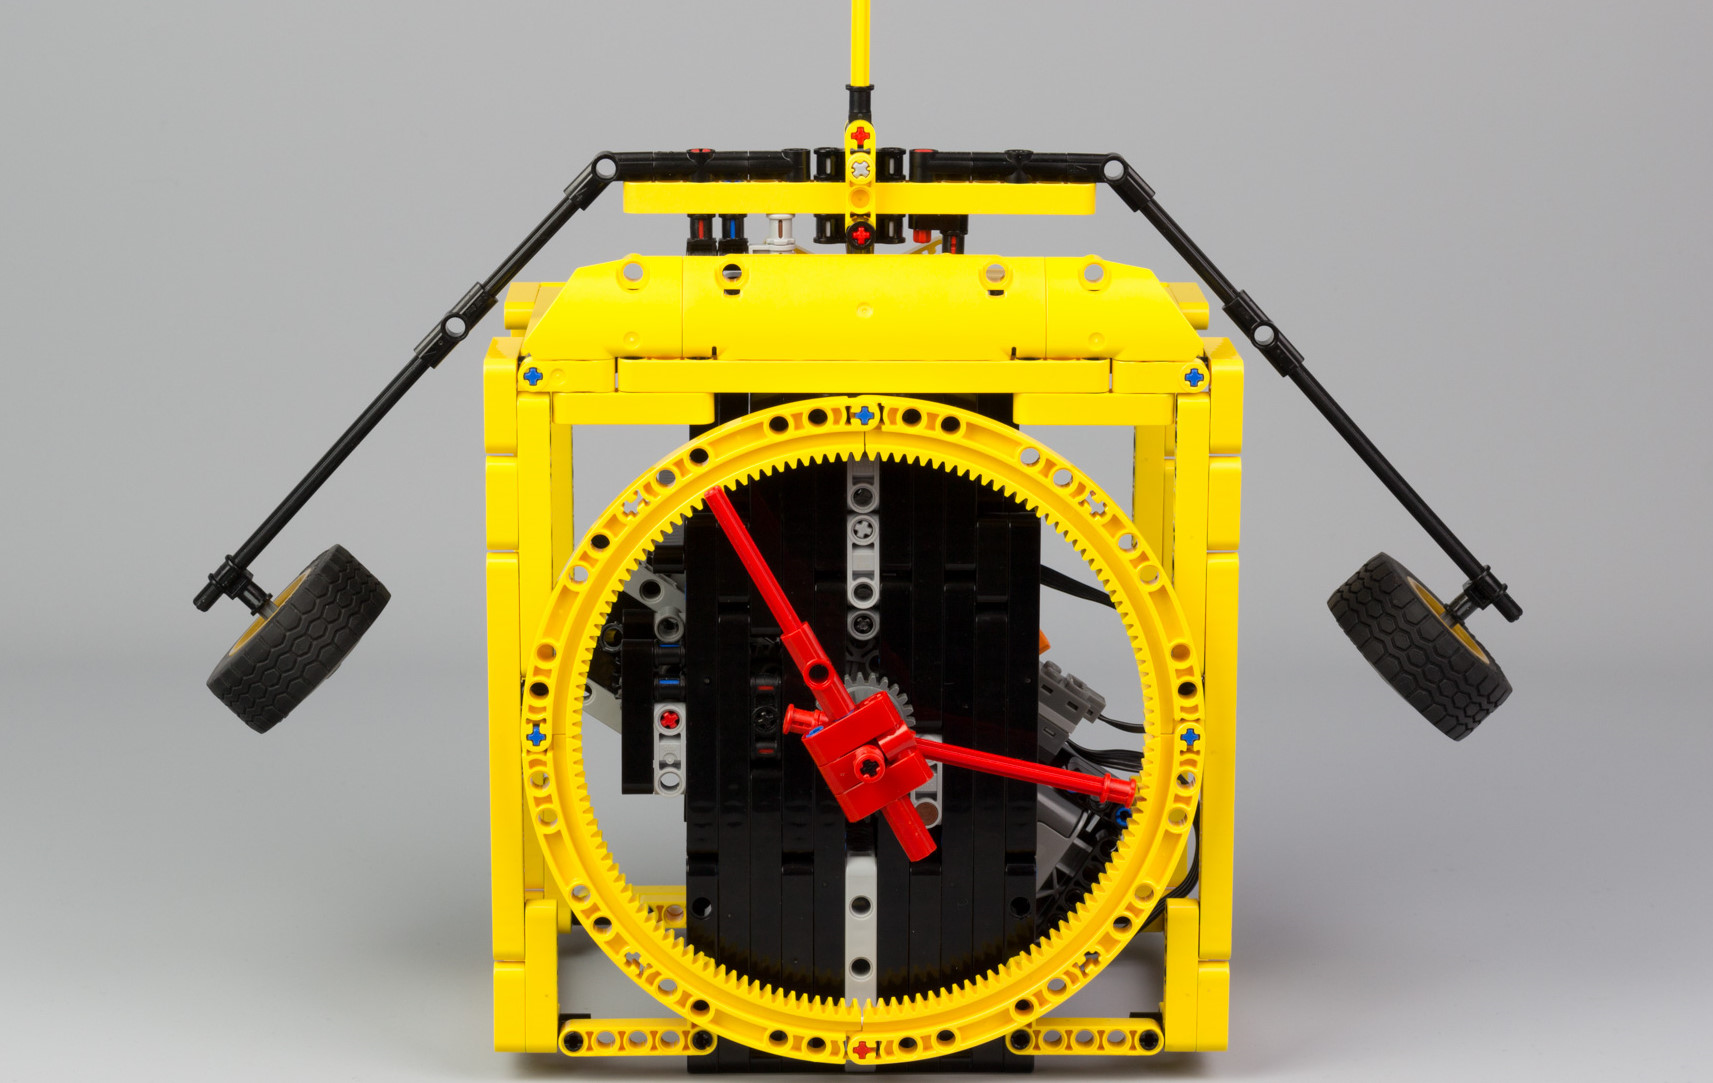

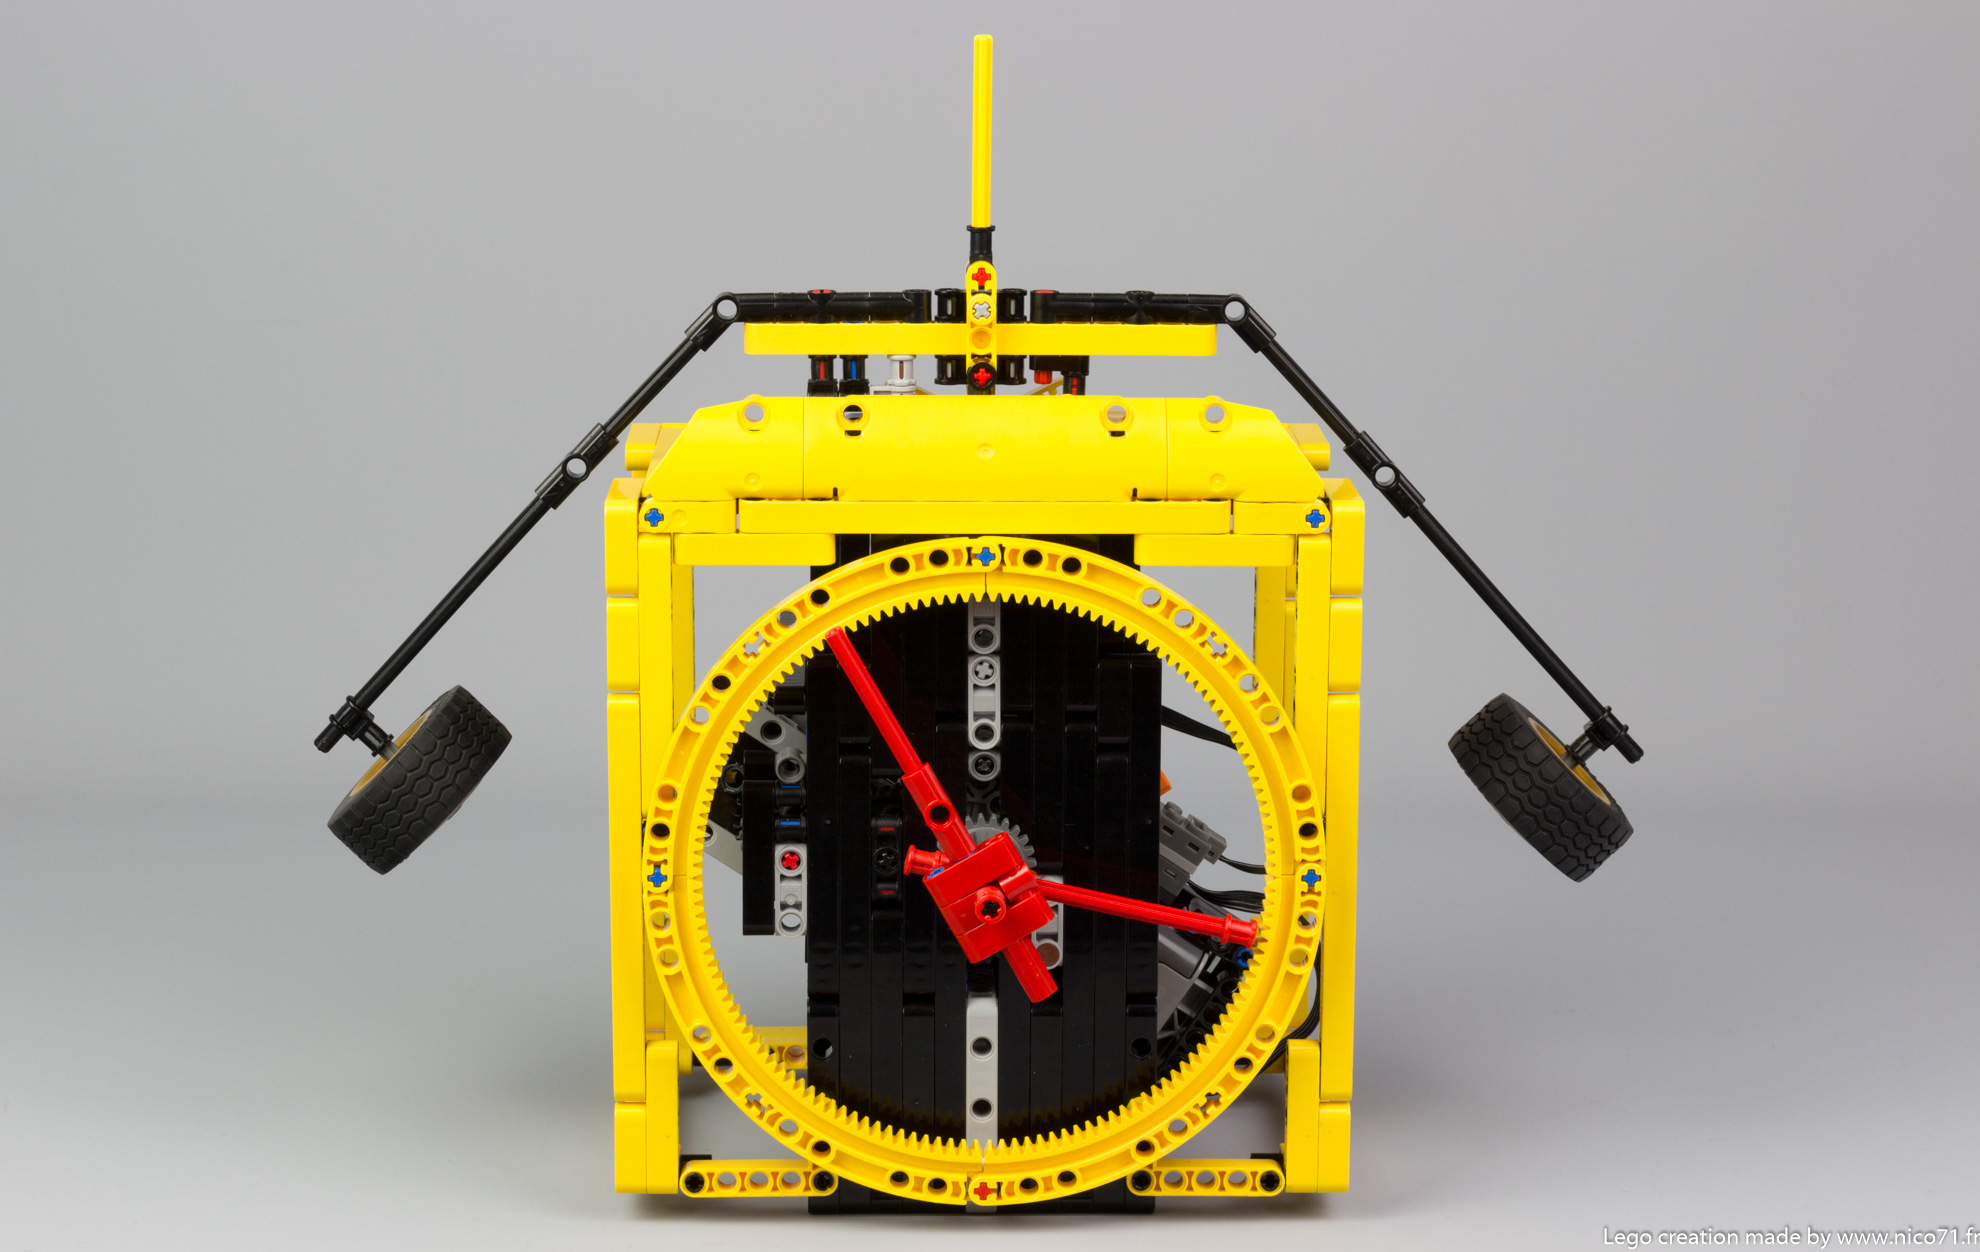
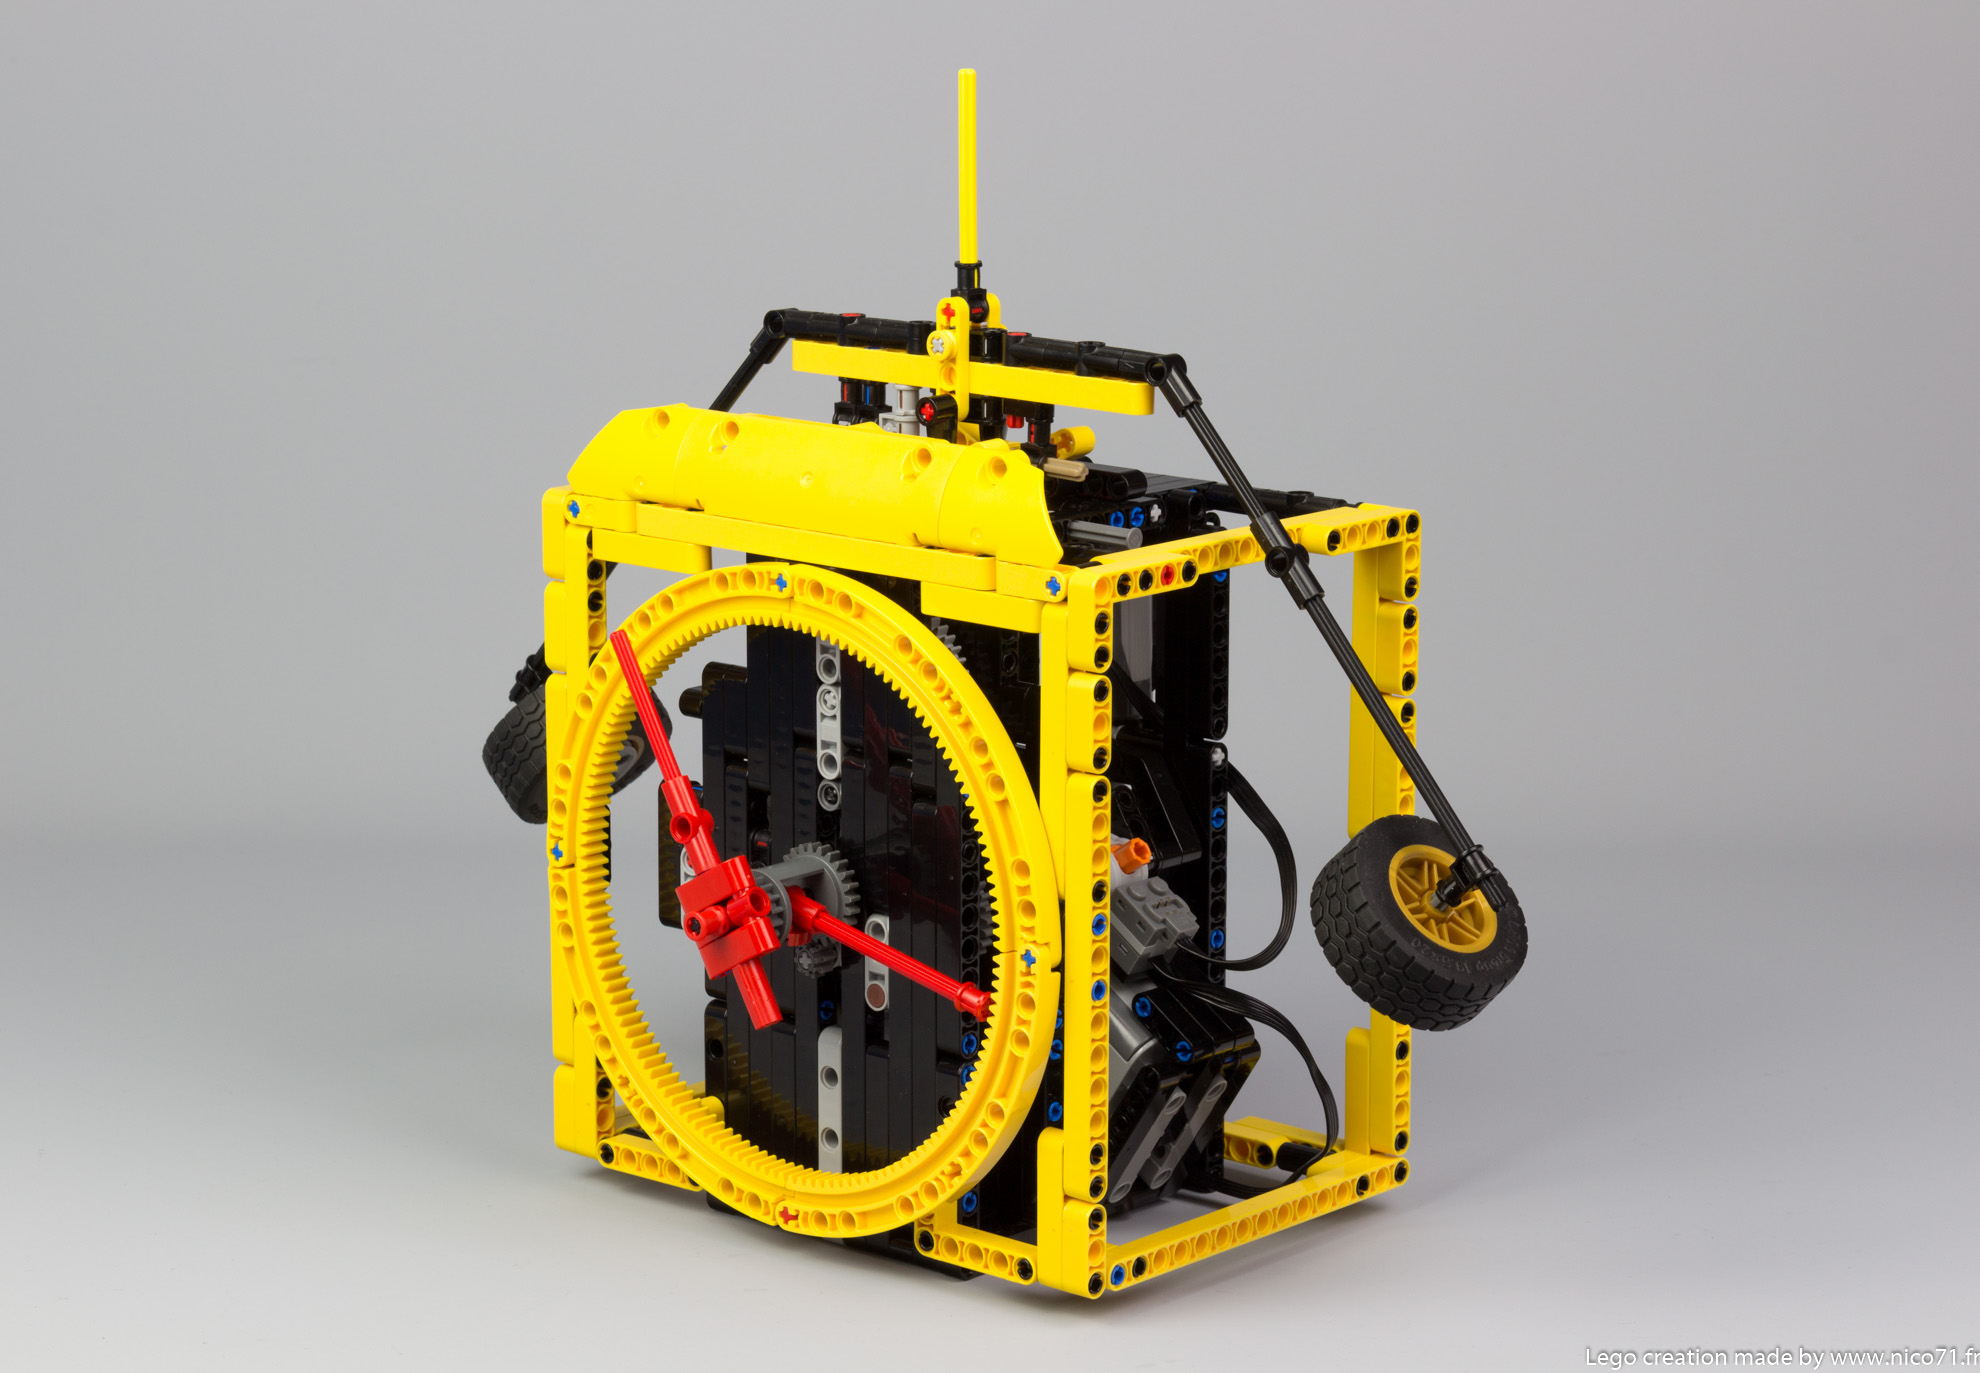
Balance Clock With Remontoire
Context
After building many clocks, I wanted to make a simple, reliable and with big autonomy clock, that is why I built the Galileo Clock. But after some years, I wanted to build a new clock, not simple and with a big autonomy, but with an interesting escapement and weight system. After some researches, and building many prototypes, here is the final result.
How does it work
I wanted from beginning to not use regular pendulum in order to display easily on a desk. I started study the flying pendulum clock but it was to hard to have a correct time keeping with only Lego (maybe for a next clock). Therefore I moved to a classic balance arm on a knife edge suspension (same as on my Galileo clock) with anchor escapement. As I wanted to keep simple the set up of the clock, I only made one setting per pallet, which is simpler than my Galileo clock but less efficient (and took many time to develop).
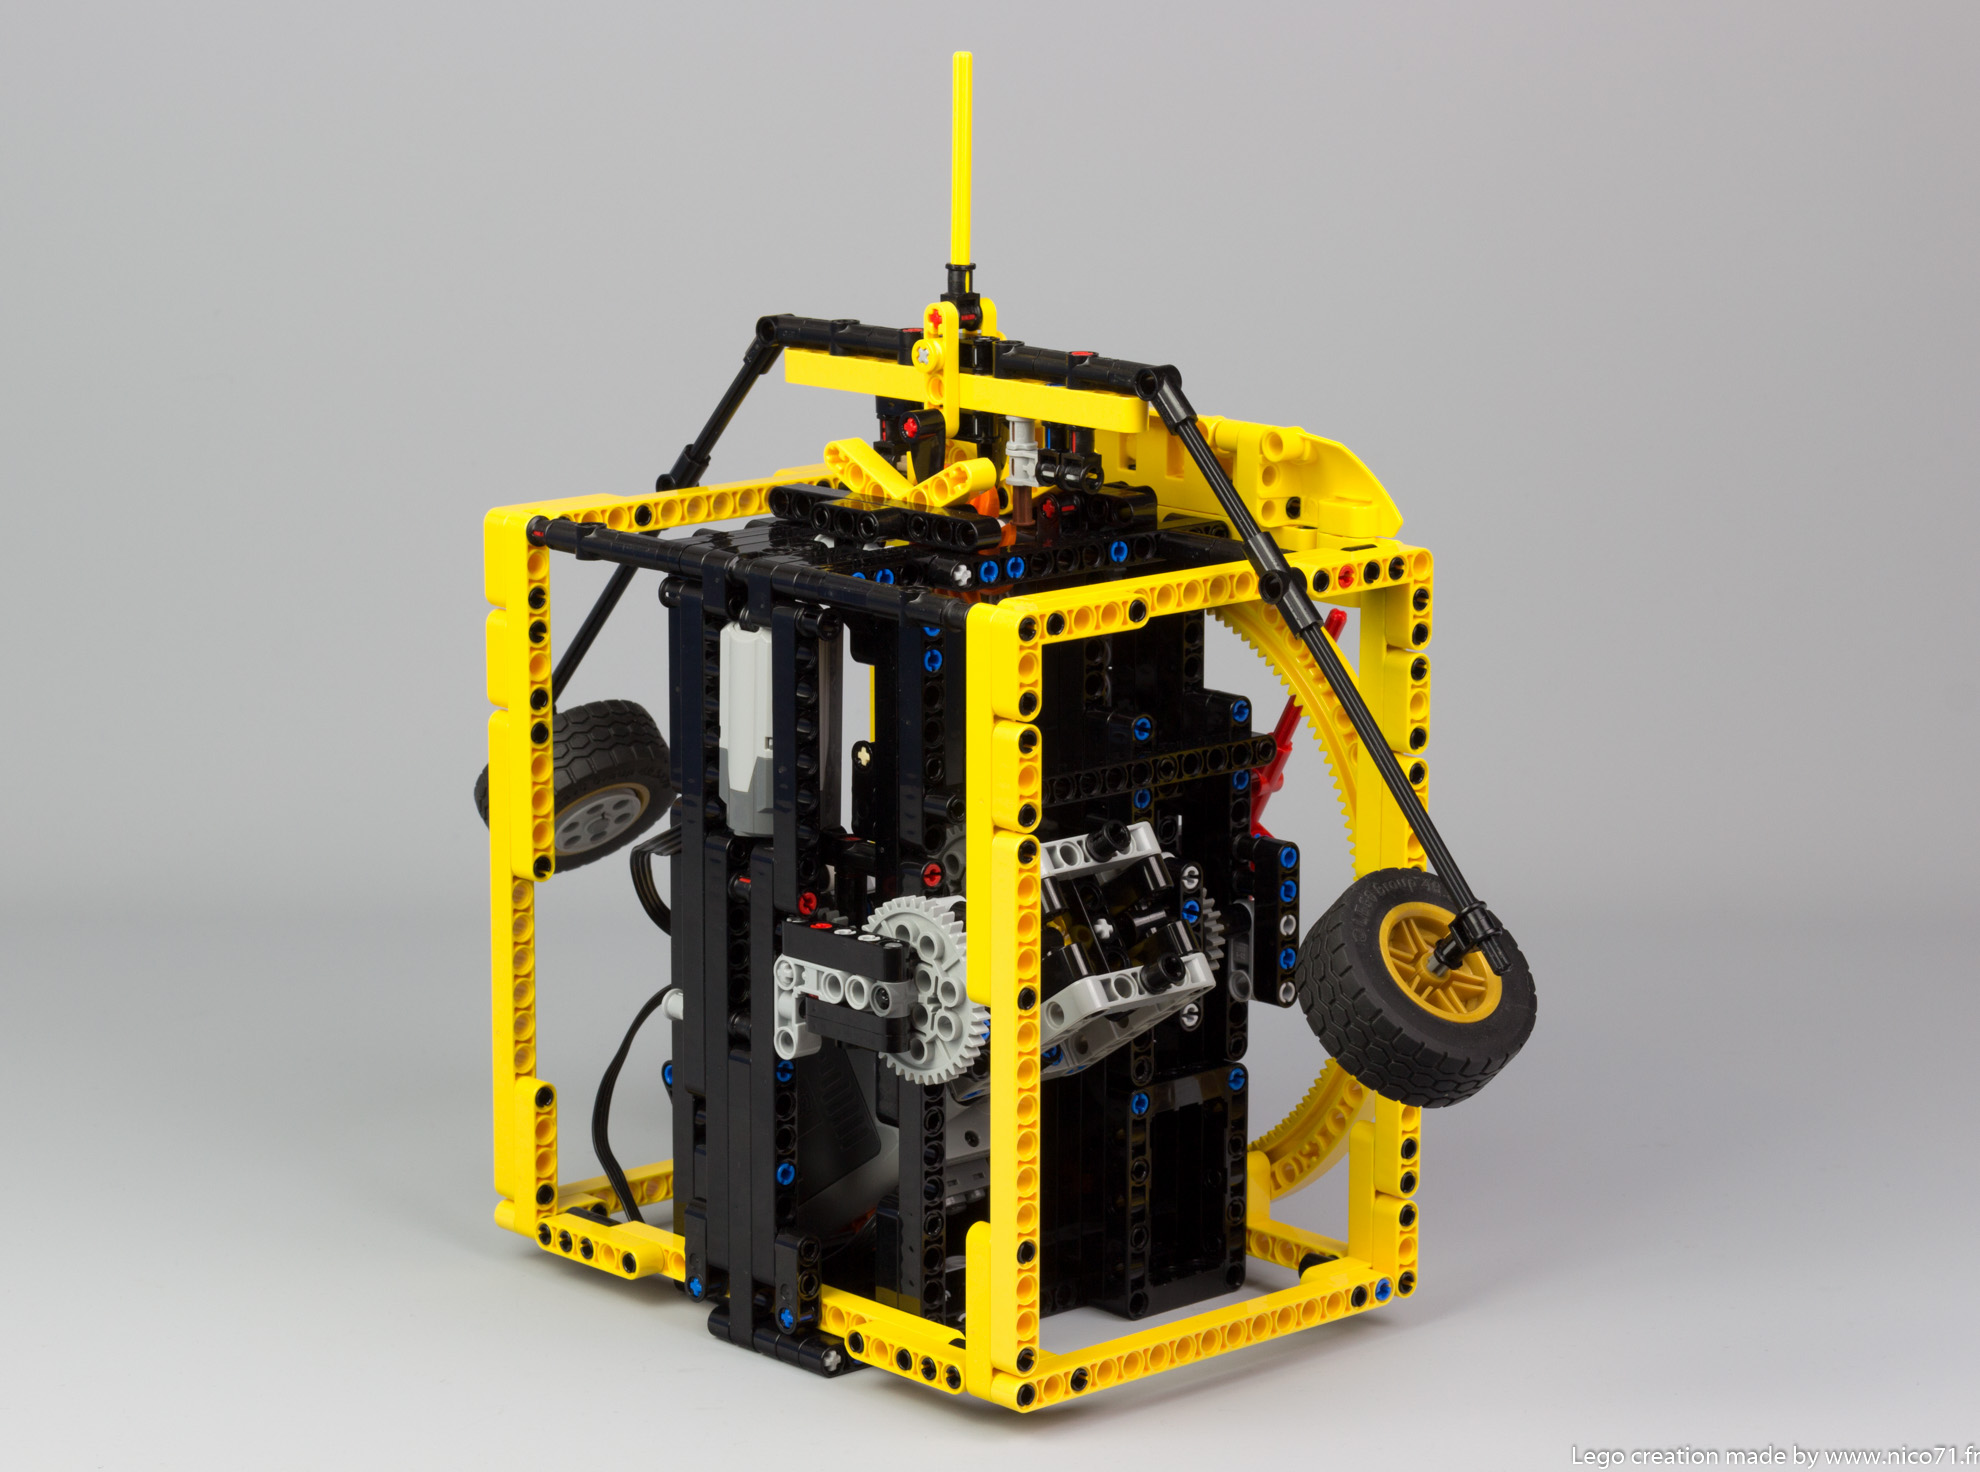
The other interesting system is weight system. I wanted first to use pullback motor, but despite the fact I have found a way to wind it without stopping the clock, the provided torque was so inconstant that the clock did not work properly. That is why I wanted after to use the battery box as the weight, I have put it on a rotary arm as the clock has to run on a desk (not room underneath). After some researches, I came to the differential idea to make the remontoire which has been patented by Edward Korfhage in 1952. You can see the principle in this gif :
Therefore, the weight (which is the battery box) is attached to the cage of the differential and give the main movement. Then, a planetary is connected to the clock drivetrain and the other planetary to the remontoire drivetrain. As the drivetrain is connected to the M-Motor with a worm gear, it is standstill. Therefore the torque is given to the clock when the weight fall.
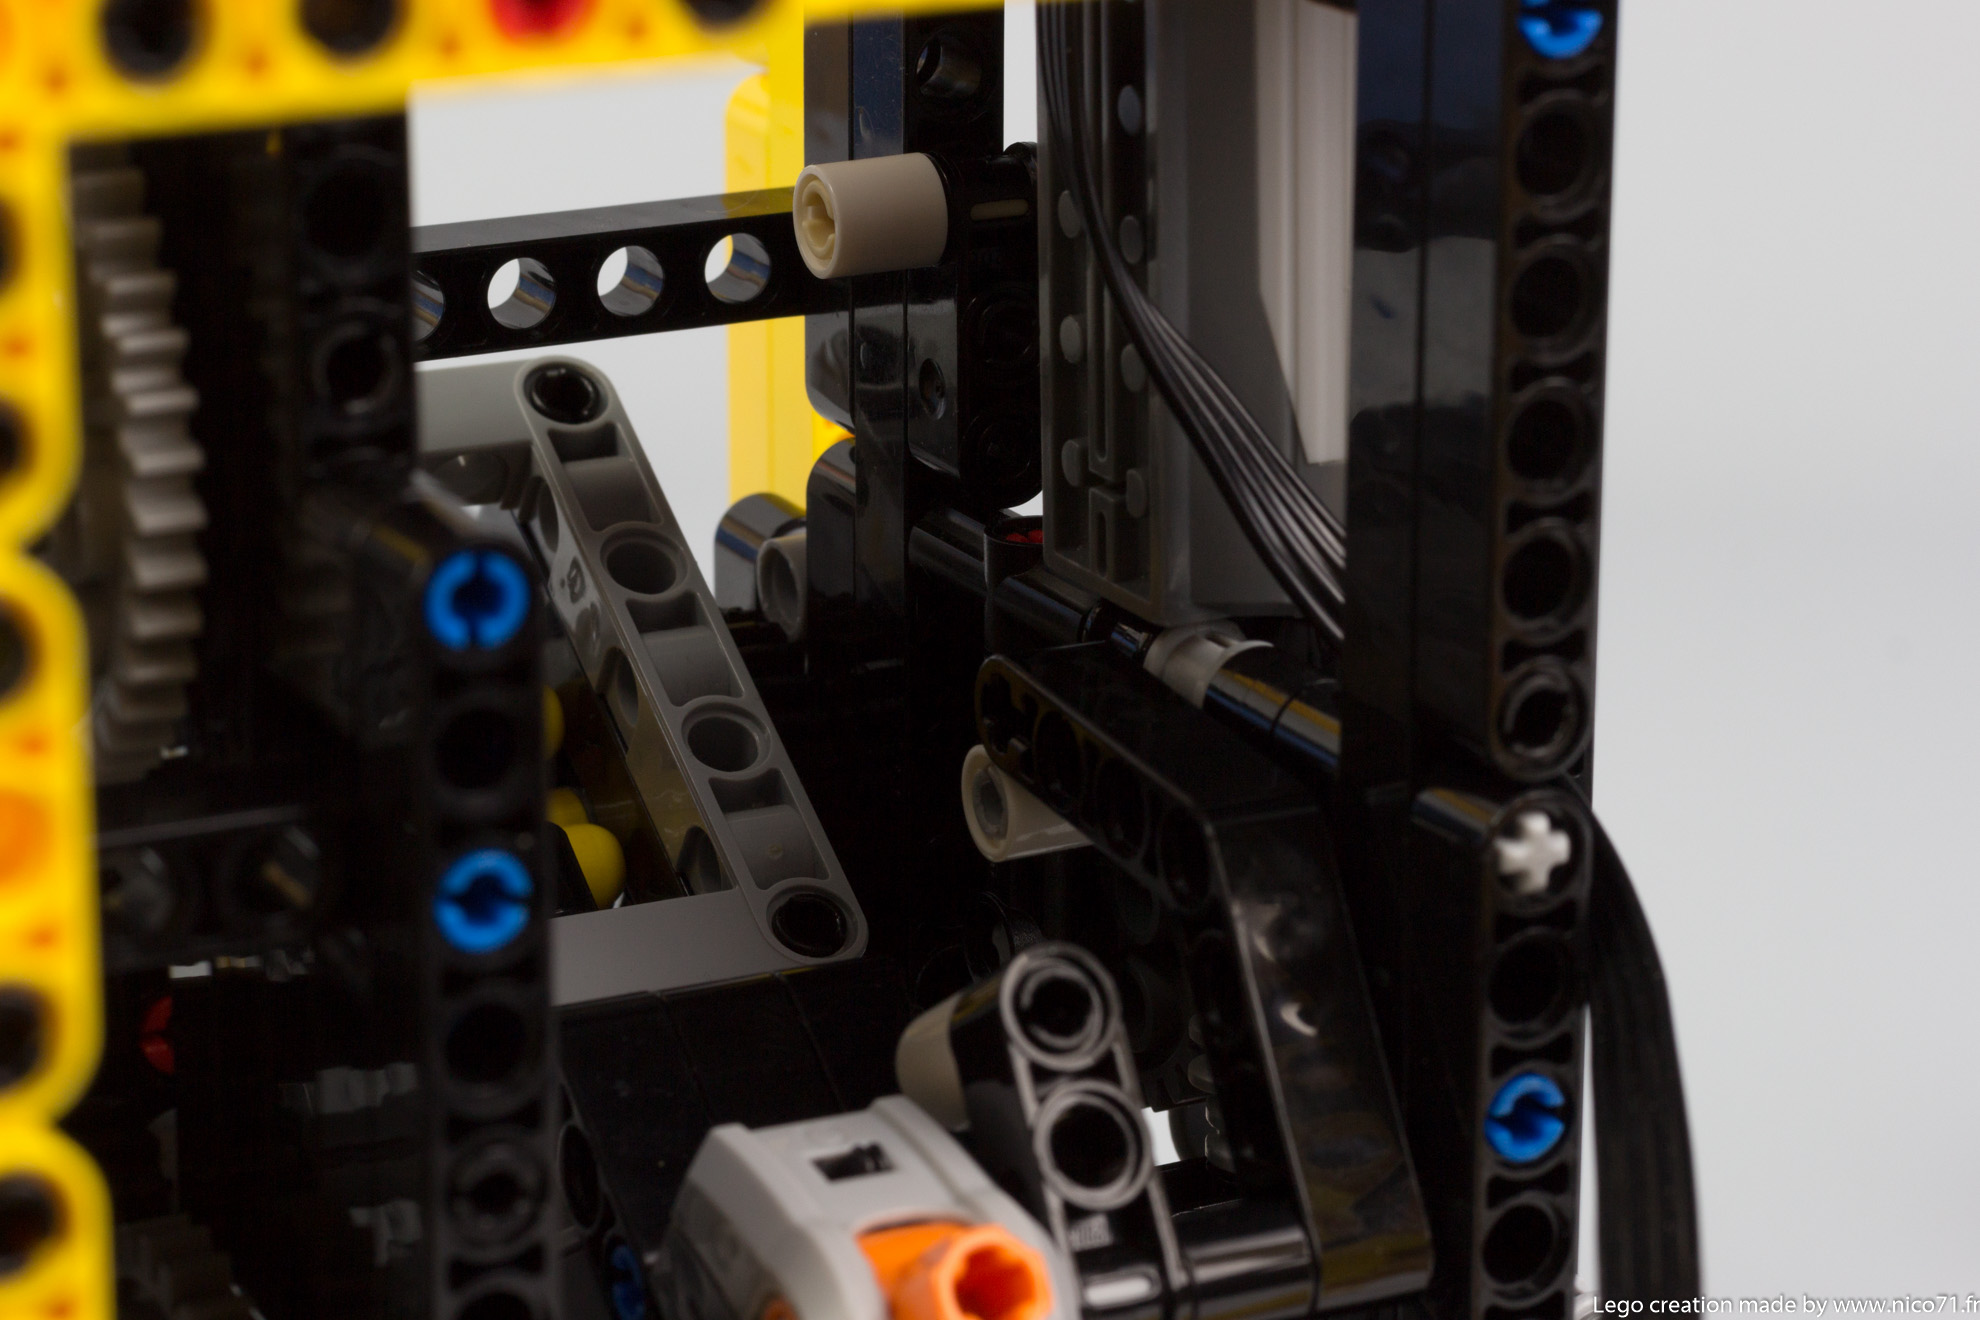
The remontoire is operated by a switch mounted on the battery box. A lever is connected to the switch, and when the battery box falls, the lever gets in contact with a white end stop which activates the switch. The motor is then powered and the differential rotated in order to lift the battery box. The stop of this movement is made by an other white end stop which put the switch to its neutral position.
You can see below some simplifed colored view of the mecanism :


Performance
Talking with performance, there are good, but not very good. The remontoire is operated every 5 minutes which may seem low but the angular displacement of the weight is also low comparing to a classic weight and drum system (with meters of rope). I have used the highest gear ratio I can for having the maximum autonomy and enough torque to operate the escapement. The ratio between the escapement wheel and the minute hand is 5:1 x 5:1 x 5:1 x 3:1 = 375:1. The escapement wheel has 8 teeth, and the tic-tac duration is 1.2sec, therefore for each second which passes, the minute hand moves about : 1 / ( 375 * 8 teeth * 1.2 sec) = 1 : 3600 which is correct. The two wheels on the extremities on the balance arm can be moved to find the correct time of tic-tac. Of course the ratio between minute hand and hours hand is 1:12 made with 12:24 x 12:24 x 8:24 = 12:1
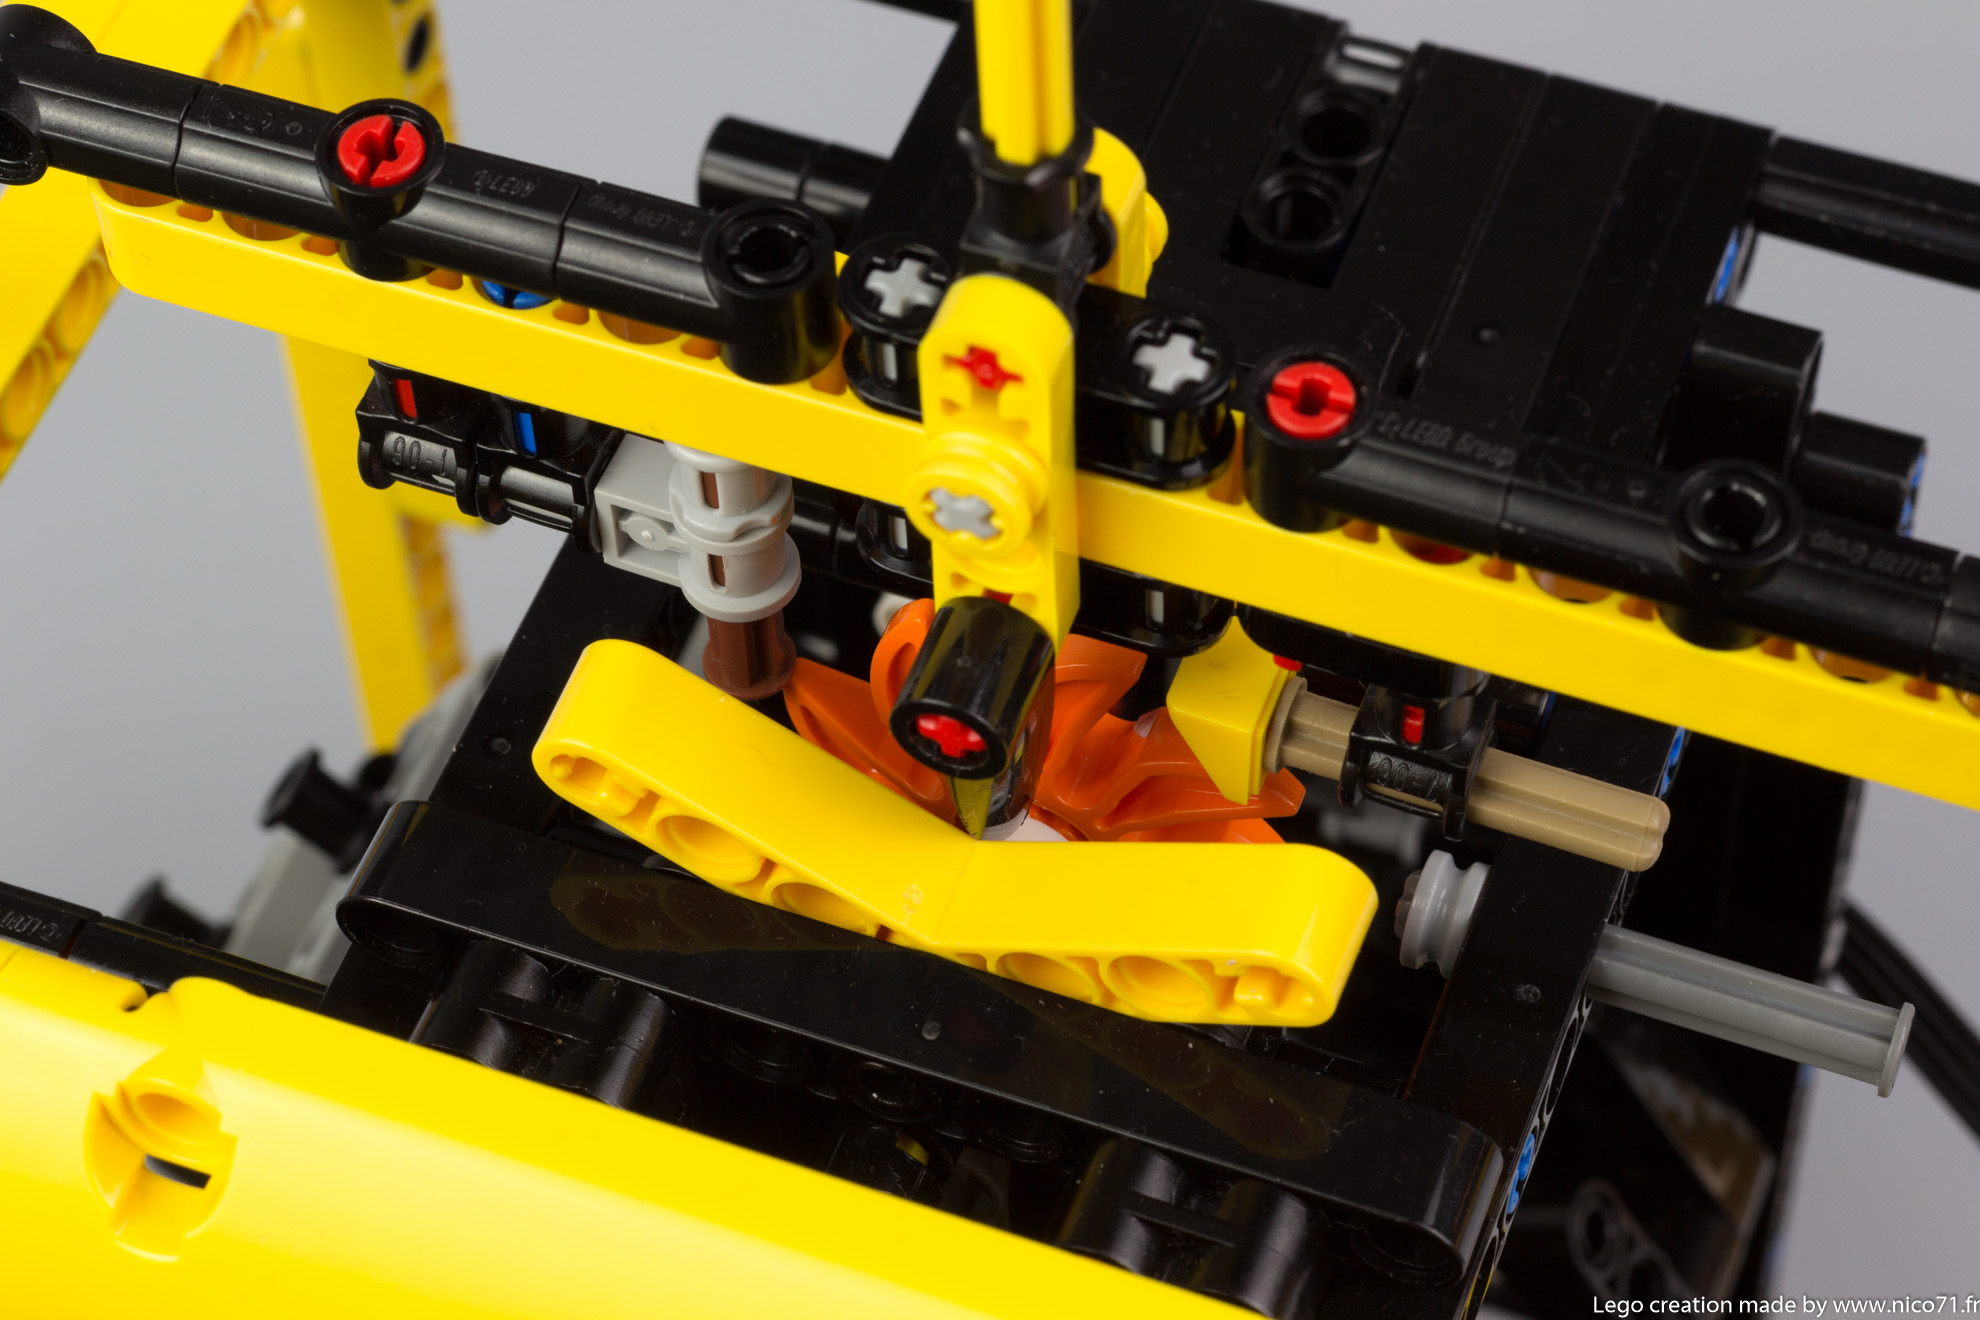
As I mentioned before, the pallet of the escapement has only one setting by pallet which is easy to setting, but of course not so efficient as a Galileo Escapement. Combining with the fact that the clock tends to speed up a little when the remontoire is powered, give a global accuracy in time keeping of about 1-5 minutes / 24h. I think the clock will run out battery before having many minutes of difference in some day.
Pictures and video


Purchasing the creations or the instructions
If you have already the parts : you can purchase the PDF instructions only on this page and build it with your LEGO parts. The instruction contains the partlist at the end, and you can check individually on Rebrickable, or in the instructions previews below.
If you do not have the parts, you can purchase the complete kit from two different retailers :
- Using Genuine LEGO Parts : This model is available on Buildamoc in a complete package including genuine LEGO parts plus the PDF instructions.
- Using non-Genuine LEGO Parts : This model is available on LesDiy Store in a complete package, including the parts (alternative bricks from China) and the PDF Instructions.
Building Instructions
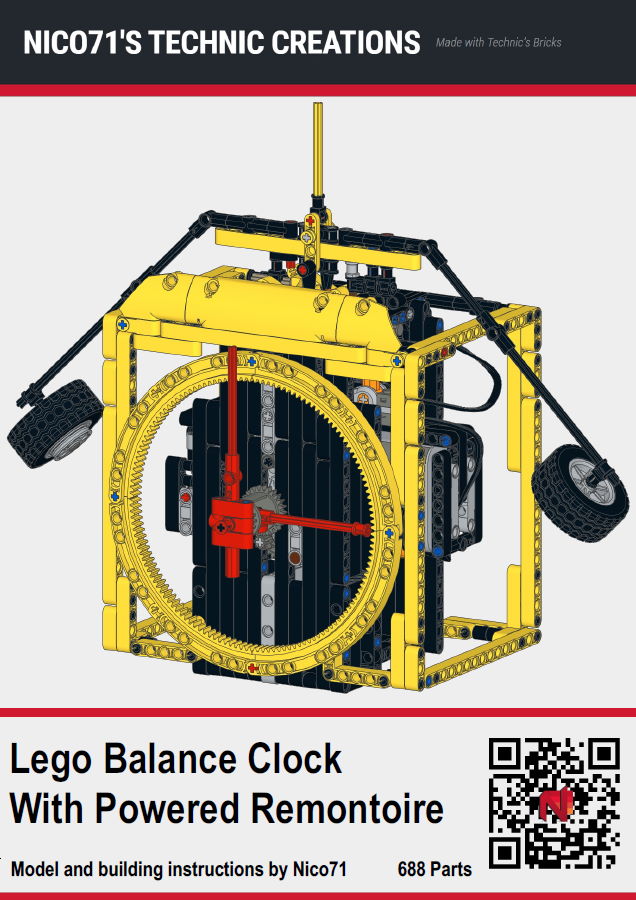
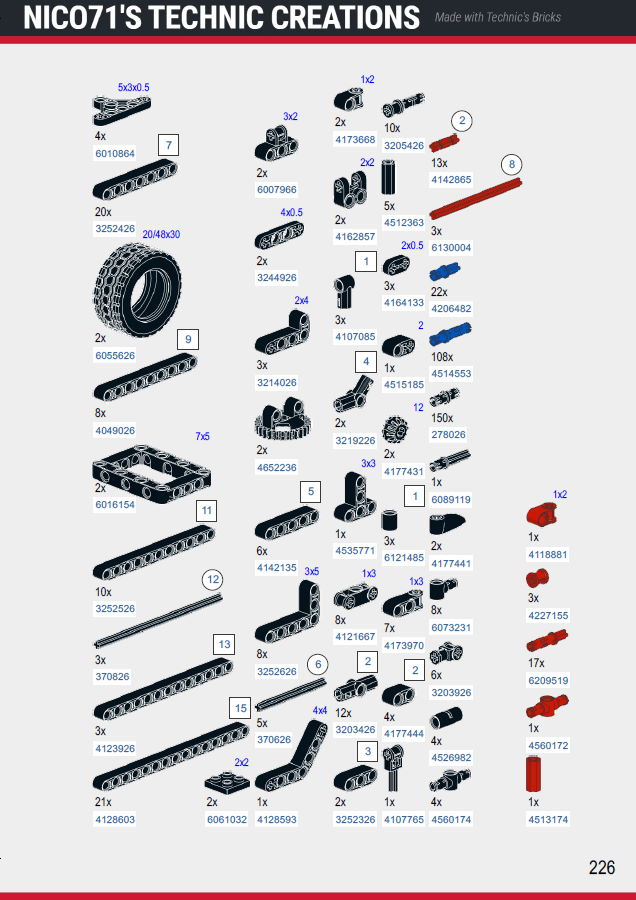
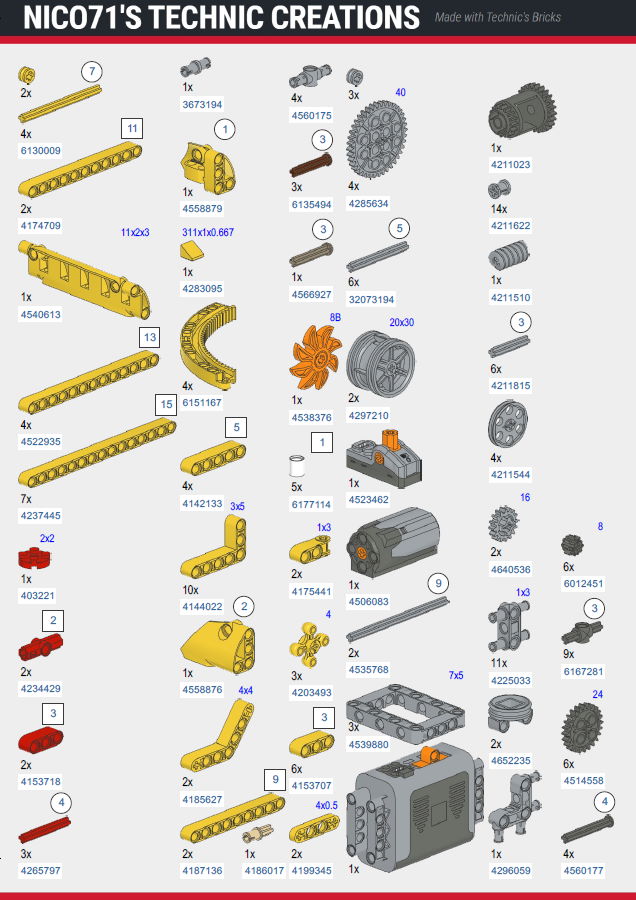
I know that people like building instructions, and I know they like even more for the clock as there are not lot of them, that is why I have created building instructions ! The building instructions are composed of 225 pages, step by step computer rendering pages which look like official Lego one, at the price of 7.5€. The instructions also provided the standard setting dimensions for the escapement and you will find a video below to know how to set up your clock. Here is the complete bill of material in picture file :
 –
– 
But you can also checked it on rebrickable and export in whatever format you want :
You can buy the instructions with the following button for 7.5€. You can also buy other building instructions and get an automated discount. You will get 15% off for 2 PDF, and 20% off for 3 PDF on the total), available for all the instructions for sale on nico71.fr.
See it on the shop :
Balance Clock With Remontoire
After your payment, you will be redirected to a page for downloading your instructions, and will receive also the link to download by email. Please check the spam box and be patient to receive it. If you have trouble to download your copy of the PDF after payment or open the document, do not make a paypal dispute, please contact me using the contact form. The link to download the instructions expires within 24h. Contact me if you have lost your instructions. Note that you can print it, but not copy or distribute. Thank you for supporting my work 🙂


(7) Comments
Bonjour, tu peux vérifier les pièces nécessaires sur rebrickable, en rentrant ta collection et en comparant avec les pièces requises. Effectivement le 42082 est une bonne base mais il va manquer des engrenages et turntable essentiels.
Peux tu en faire une a peu près pareil avec les pièces du 42082 et la batmobile télécommandée?
J’ai l’impression que l’inventaire est a peu près le même.
Merci pour votre retour 🙂
Notice bien détaillée et superbe horloge. Même ma femme adore un LEGO Technic! 🙂
Merci 🙂
Merci pour ce mode d’emploi très complet. Je viens de terminer l’horloge et elle fonctionne super bien. 🙂
You’re a wizard.
Comments are closed.