
A Lego Retro Futuristic Car featured Drives, steering, motorized doors and roof thanks to Buwizz. And front and rear suspension, light and openable trunk.
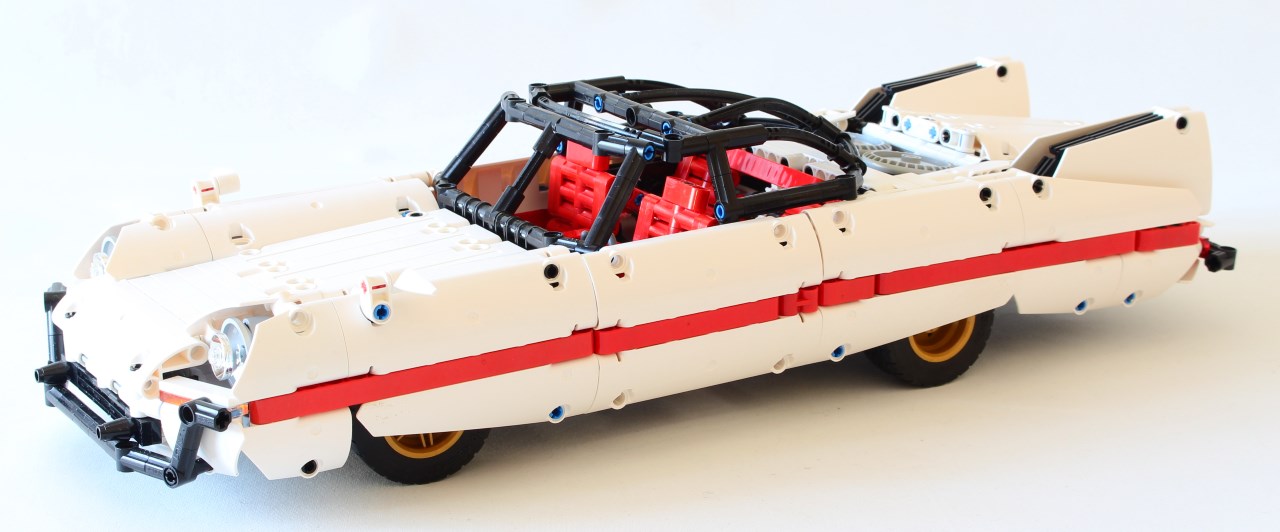
The idea was for a long time to create a classic american car for the design, I have tried to work on some Cadillac and Lincoln but it was always hard to work on dedicated model. So I decided to create my own. After playing some (or many…) hours to Fallout 4 and liking this license, I wanted to create my own lego car Fallout design inspired also called Retro-Futuristic, or the future see from previous century.

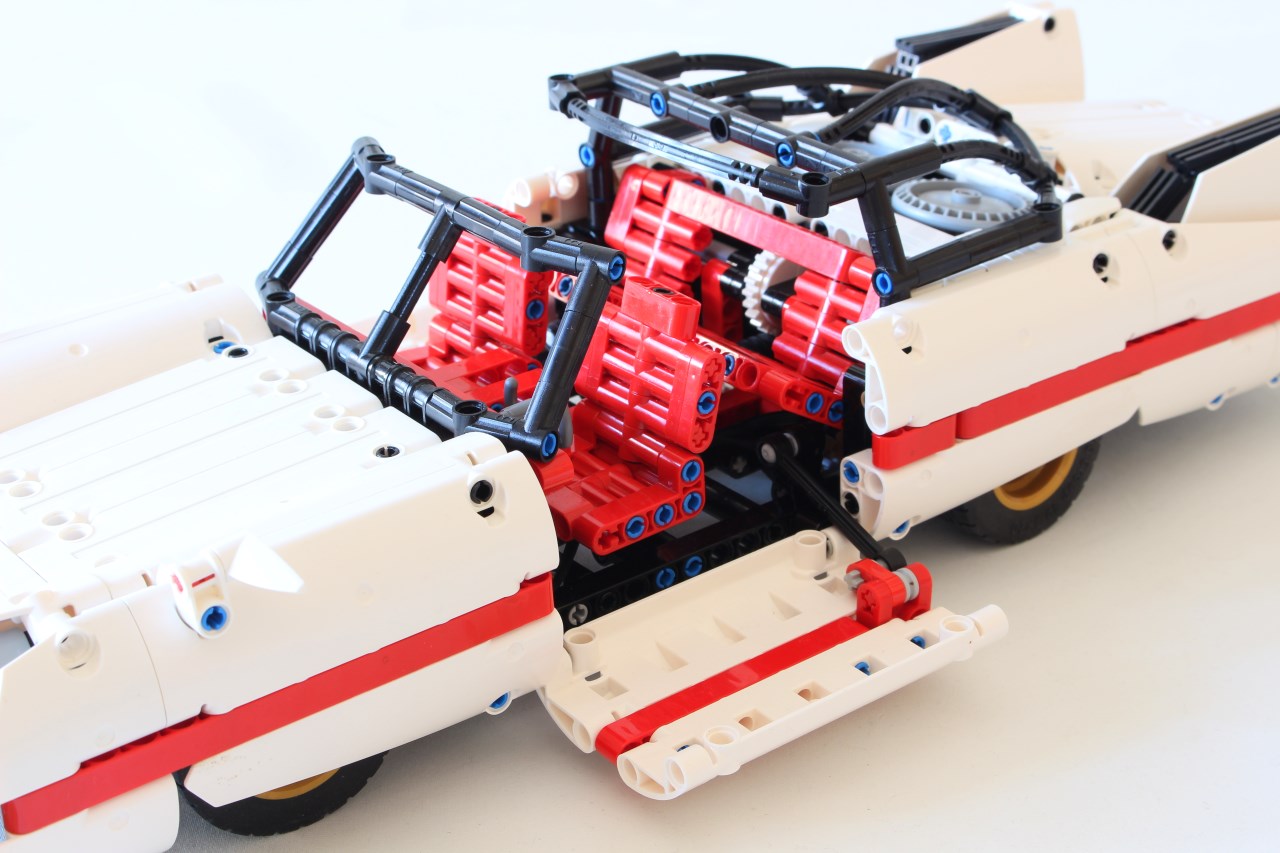
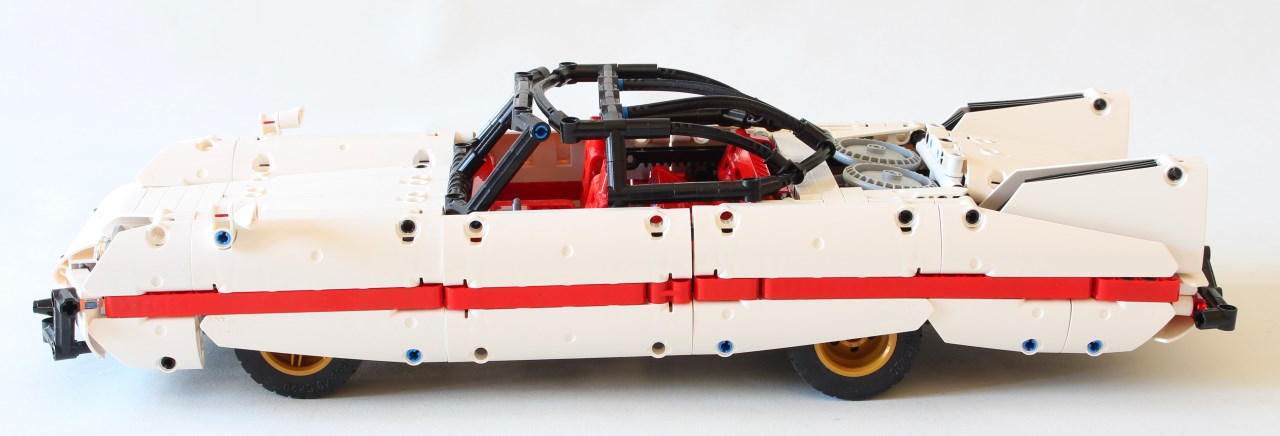
Therefore, I have chosen a free design. I have started to build the bodywork in functions of the available panel especially for the mudguard and hood and rear wings. After that I added some details and started the mechanical assembly. The drive is operated by a L-Motor located in the rear oscillating axle. It enables me to place the motor on the bottom of the chassis and liberate some space on the top for the suspensions and fake nuclear engine. The gearing is 12/20 and 16t/differential.
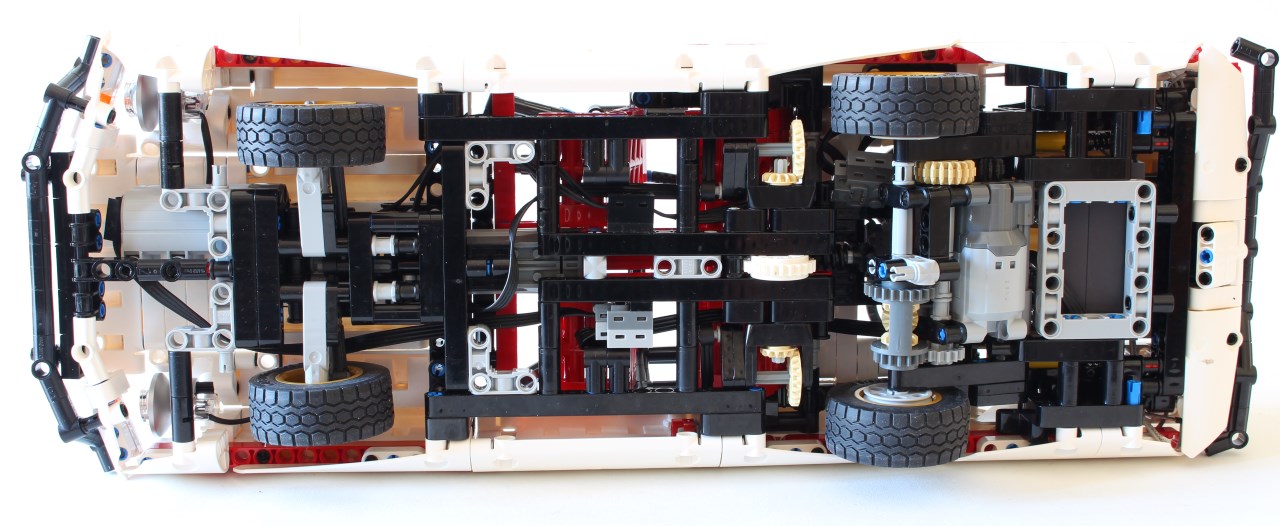
The steering is operated by a servo motor with a simple linkage and lever. The servo is located in front of the steering behind the front bumper.
The suspensions are quite classic at the rear, there is a rigid articulated axle with a differential, and two shock absorbers located on each side behind the axle (juste underneath the rear wing), again for more space on the axle to put the system of opening doors and roof. The front suspension do not use shock absorbers because of available room behind the front fender but a torsion axle of 8 stud length in order to keep space and have a front bodywork as low as possible.
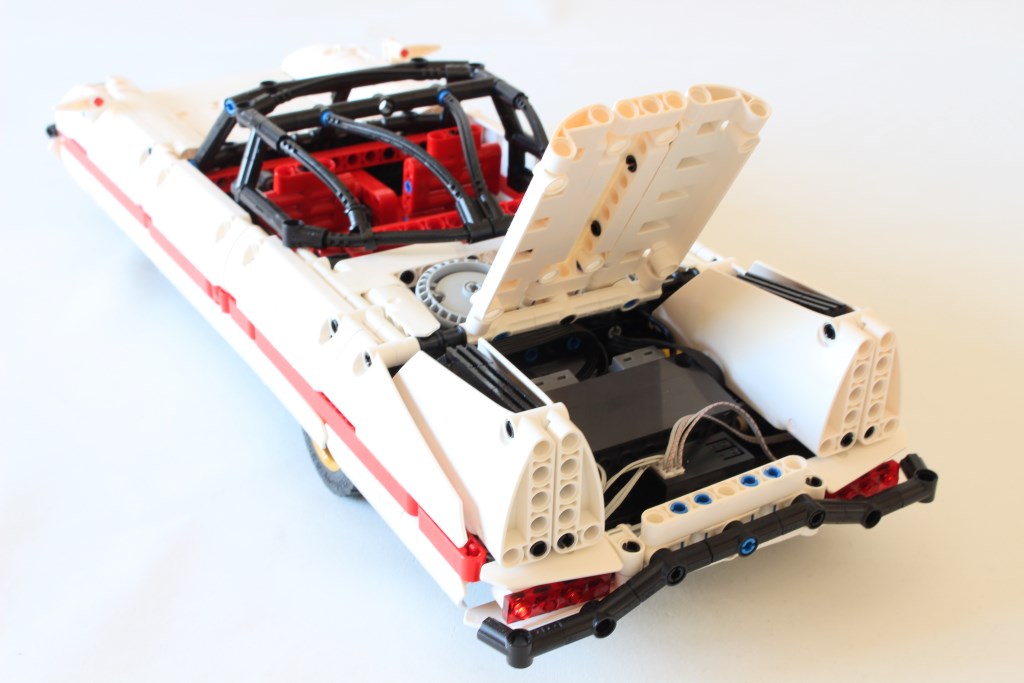
The opening doors and roof system has been the most complicated thing to do on it. Not because of the complexity of the system, the functioning is quite simple, but because of the lack of room. I have put the M-motor on the center of the cockpit. It drives a axle with worm gear, which drives by two bevel gear a lever with connecting rod to the door. For the roof, the axle goes far and drives an other worm screw on a 24t clutch and two rack and pinion using long 11L rack in order to translate the roof.

The main difficulty, after having the correct design was to put all mechanical devices in this car. First the servo for the steering and the suspension in order to have a low bodywork as possible. Then the rear axle in order to have enough space for the opening system of roof. And then the layout of the drive of this system in order to have enough space to get a correct detailed cockpit. Therefore, a rather small car but with lot of parts and no much room inside.
Regarding the design, I have started by that because it was an important element for visual identity of the car. In other word, if the design is failed, the car is failed. Therefore, I have started by that and make the design using the available panels. For that I have create my own design in function of panel, in order to reduce gap between parts and also homogeneity of the design. I think I have rather succeeded.
Concerning the buwizz, At first I do not need to put in (I would like to make a dedicated video for it), but when I finished the mechanics, I had not enough space to put two IR receivers. That is why I put a buwizz in and the problem was solved ! The buwizz is quite awesome regarding performance and size (check my first review here). At first the buwizz do not work with my Asus phone (like the sbrick which has never worked with it) but after and update from buwizz, no problem. The interface is simple and easy to understand and to connect. The default profiles are easy to use and the buwizz responds very good to action on the phone. Plus a fast mode for the motor which enable 11V on it (no damage for the motor).
Therefore, I really encourage you to buy one, this is way better than sbrick. Despite the price, you have the equivalent of a working sbrick with a lipo battery which can be charger by a simple usb type B. So not too much money comparing to lego PFS solutions.


I have make some picture during the dismantling, in order to enable you to rebuild it. you can check also the bill of material of on rebrickable :

Brickstore and Bricklink Bill or Material (ZIP) (1mo)
Download the high definition building instructions in PDF here : Lego Retro Futuristic Car Instructions (PDF – 8mo)
Or browsing the gallery :


(2) Comments
I really like it. Nice work!
[…] classy blog not interested in clickbait we’re seamlessly jumping on the bandwagon with this, Nico71‘s glorious Fallout 4 inspired retro-futuristic nuclear concept […]
Comments are closed.