
A different moc for me ! Features Drives, steering, suspensions and fake engine.
The context
Some weeks ago, I have made a bricklink order to purchase some parts I need, including the wheel and tires for the Honda RA 300, I have also purchased some small wheels and tires, and finally the big rear wheels of the Lego Tumbler. Then, I have searched for a creations which uses these particular bubble tires. I didn’t want to use as standard tire like a 4×4 with these tires, that is why I have found this idea about building a Lego Hot Rod in order to have different size of tire and a aggressive look. Here is the result !
Functionality
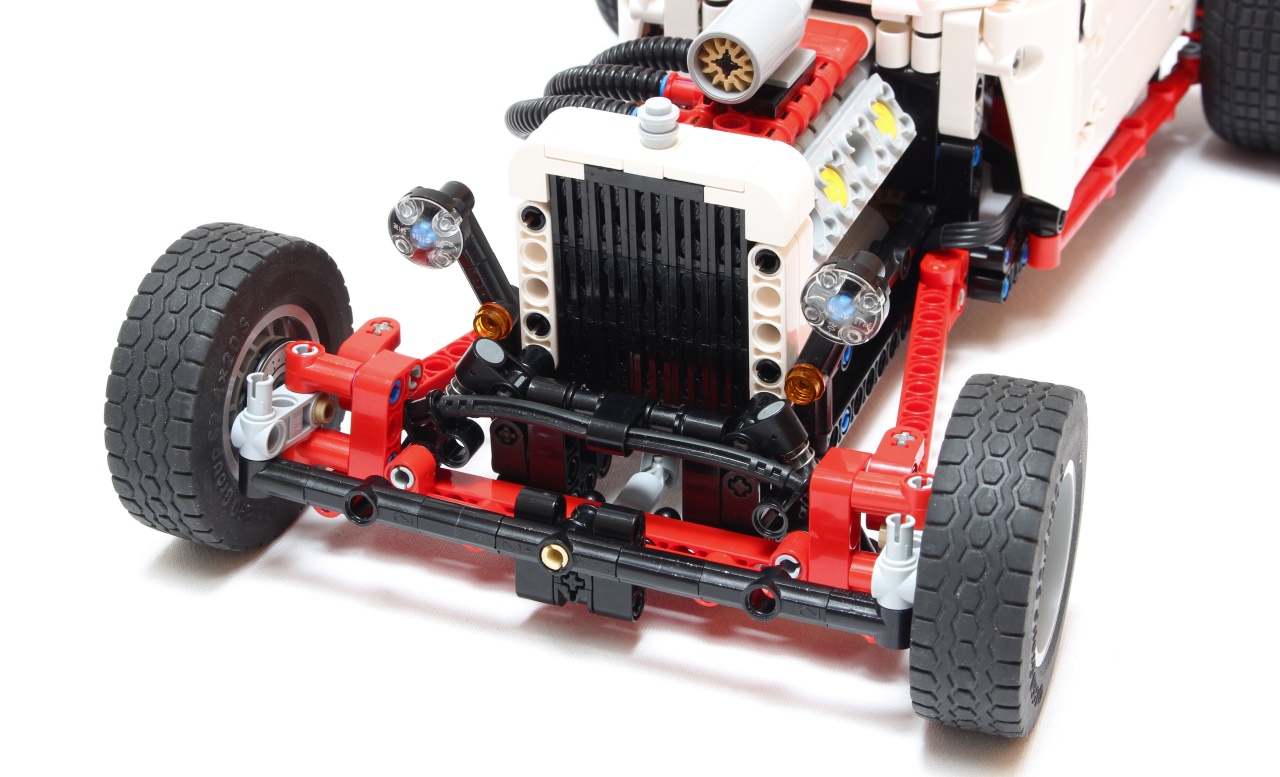
There are basically what we can looking for a motorized vehicle : drives, fake engine, steering, but also suspensions. The hot-rod is powered by two L motor located in the frame, underneath the seat, which is connected to the rear axle with 20/16 – 12/20 – 20/differential gearing, ensuring a good speed with torque. The steering is powered by a servo motor underneath the fake engine which is connected to the front axle using two U-join due to the front suspension. It makes rotate a lever which is connected to the main steering rod.
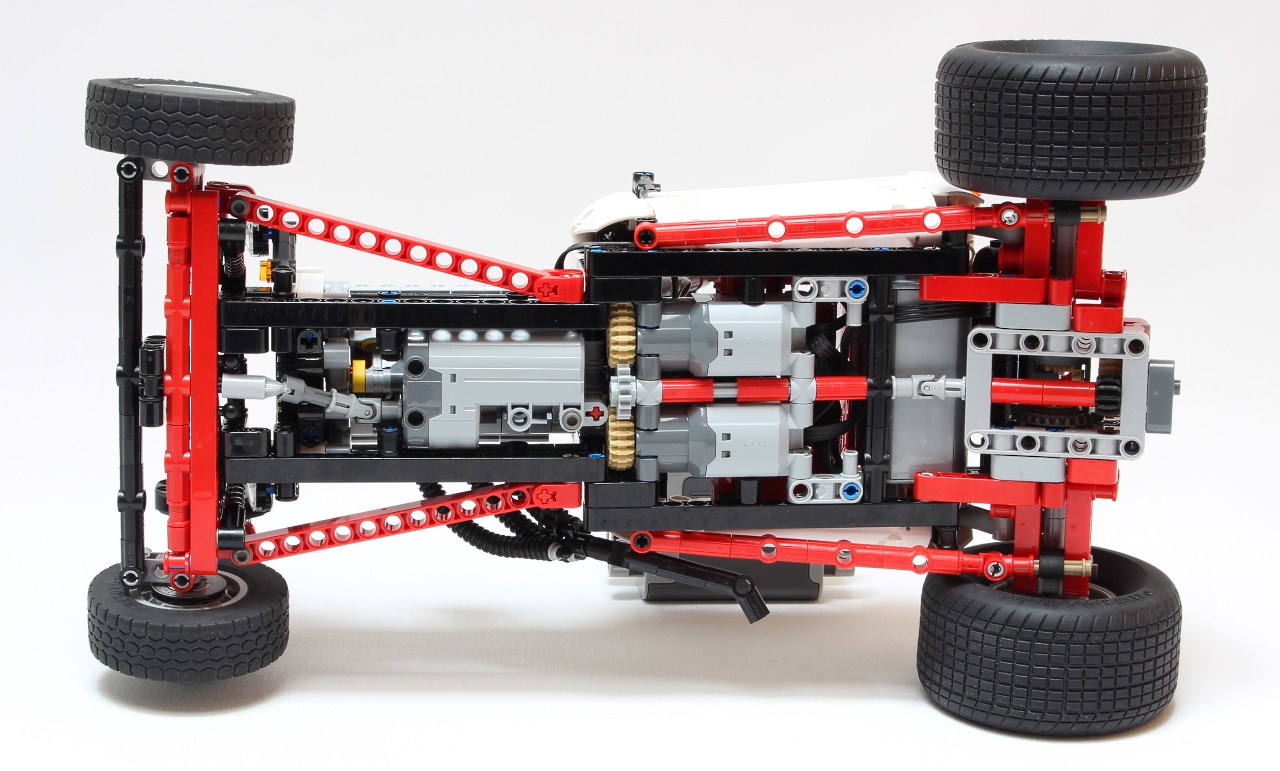
The rear suspension is basic. The rear axle is articulated with two pivot points, then two shock aborbers are connected to the frame, which makes a rigid axle. The front suspensions is more complicated, this is a floating axle which remains stable using a flex like a leaf spring, then two shock absorbers (which come from a unmounted lego spring) are placed each side of the frame and are connected to the front axle. The angle of the suspension, combined with the long rod on each side ensure a good suspensions with good guidance.
The design
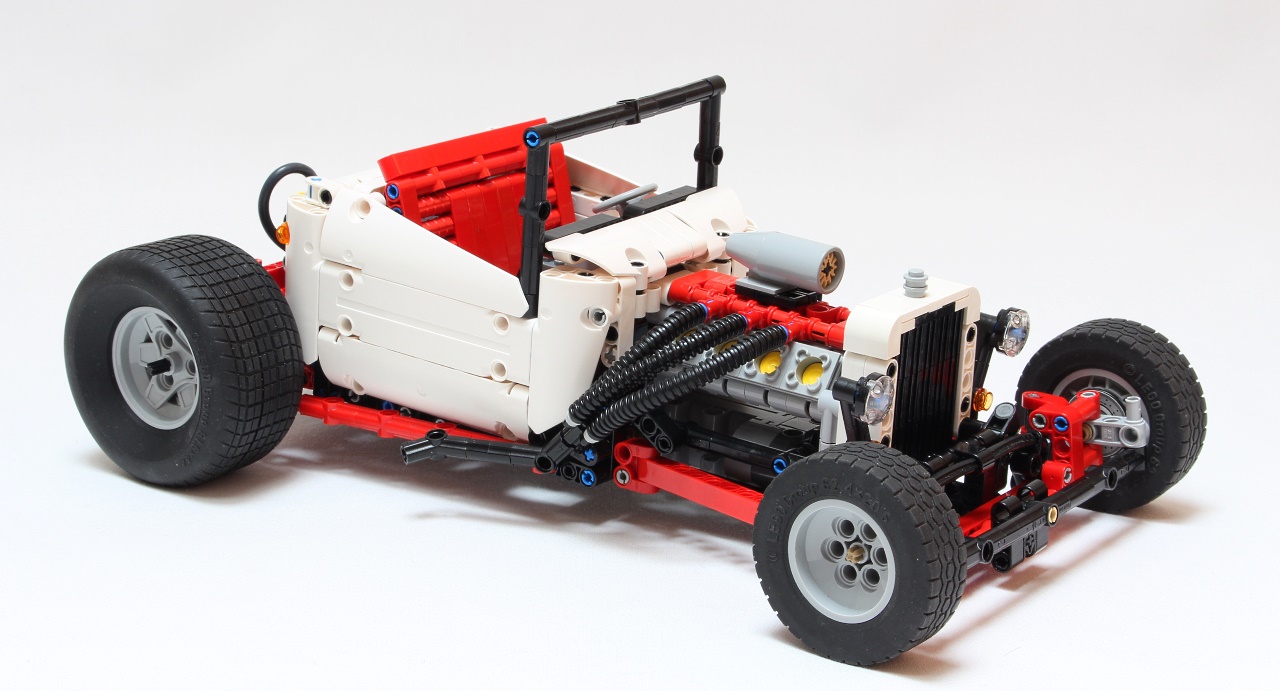
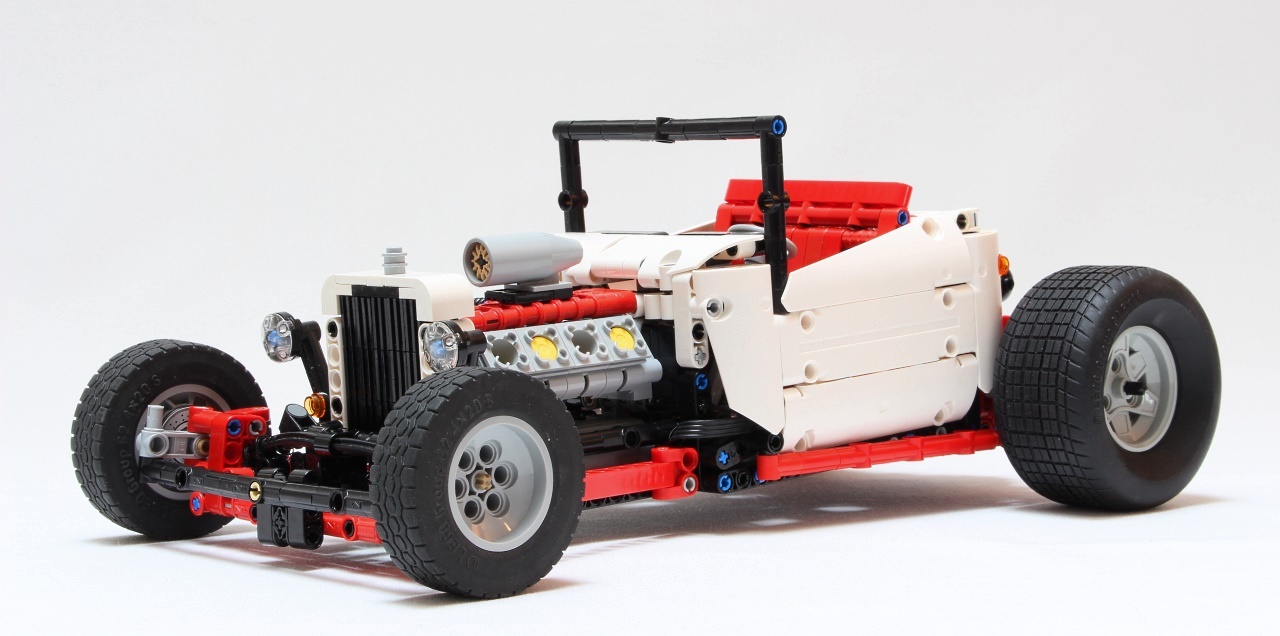
The design has been a good parts of the building process. I wanted to have a good looking hot-rod with nice color scheme and aggressive bodywork. That is why I have chosen to make the frame in black, the moving element like axle and suspensions in red, and then the bodywork in white. First of all, I have designed the front axle, in order to fit the real axle of a hot-rod with leaf spring, suspensions and guidance rod on each side.
Then the front axle has been build, in a solid form in order to handle the power of the motors with the suspension. At the finishing, I have put together the front and rear axle by building the frame with the motors and make the bodywork. I have chosen the have the fake engine visible in order to have aggressive look, reinforce with the big intake on it and the exhaust pipe. The front face is important also because of the shape of the radiator and of course the cork. I used here simple beam with corner tile.
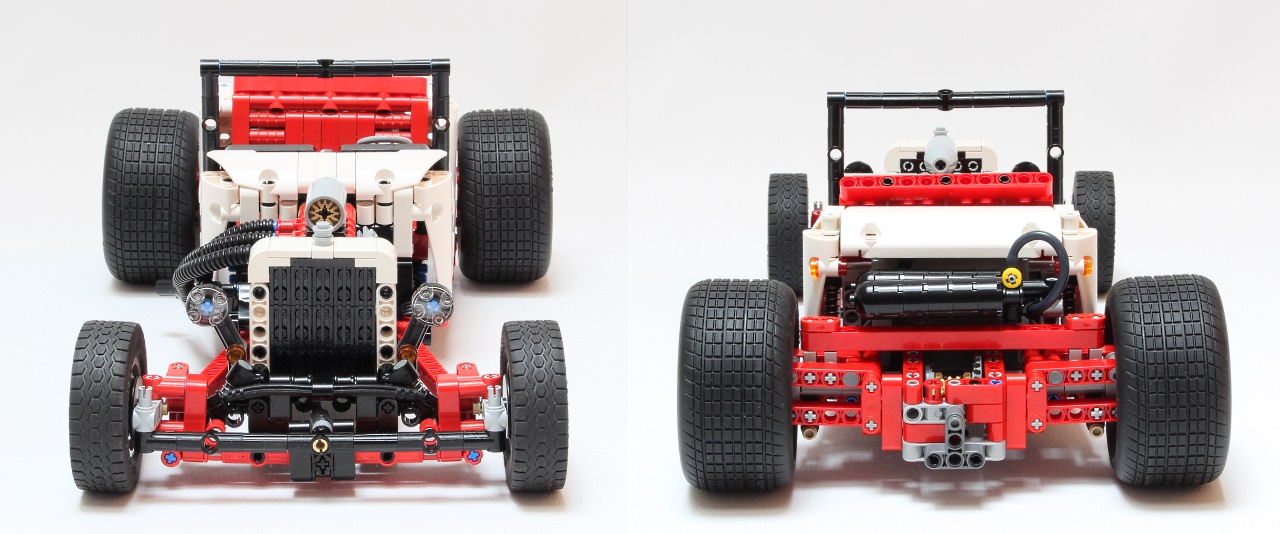
Regarding the “bucket”, I have use simple panel, with choosing the correct wheel base in order to fit correctly the panel and have good design with less parts, this is important to have good homogeneous design. On each side I uses curved panel, to make the bucket shape, with front and rear panel also (near the windscreen and the tail). In order to attached the panel with a little slope for a curvy shape, I use simple pin without friction, it cans be considered as a illegal build if I used pin with friction but here without friction, the pin allow some moving in order to attached the panel in this way. Concerning the interior, I have reproduce a front shape windscreen using simple connector and make some details : steering wheel, seat.
Concerning the seat I have used some old axle connector for making the excluder form of the seat. Note that by rotating the back of the seat, you discovered the battery box located behind. The battery box has been very difficult to hide, at the beginning on the floor of the frame but it made the seat to high, therefore I have moved the battery box behind using this shape for reinforce the chassis, in fact the rear suspension is attached to the battery box which is used as a part of the frame like the engine which reinforce the front structure. At the rear there is some detail including the gas tank with manometer and light.

At finish, the design is nice and simple, which make a aggressive look using the rear wheel and enable to have less weight which is better for driving.
Pictures and video


Building Instructions
As usual, I have made building instructions for this moc, as a PDF photo sequence.
Bill of Material
Here is the complete partlist of necessary parts for creating the hot-rod, you can check it online with rebrickable :
The instructions
You can download the high resolution PDF of the instructions here (25mo) : Hot Rod Instructions by Nico71.pdf
Or watch it online in low definition :


(5) Comments
Wow thats a beauty!
Bonjour, tu peux soit les télécharger en version PDF photo sequence, sinon pour 5€ via paypal, tu as les instructions professionnels qui détaille étape par étape la construction.
Es que je peux avoir les instructions de montage de ce monster energy baja truck recoil ? Merci
You have that rare talent to keep it simple, efficient, good looking. That hotrod is perfect. You not fall in the trap of doing too much. I highly respect that.
[…] lots more to see at Nico71’s website including a video of the T-Bucket in action as well as a complete parts list and building […]
Comments are closed.