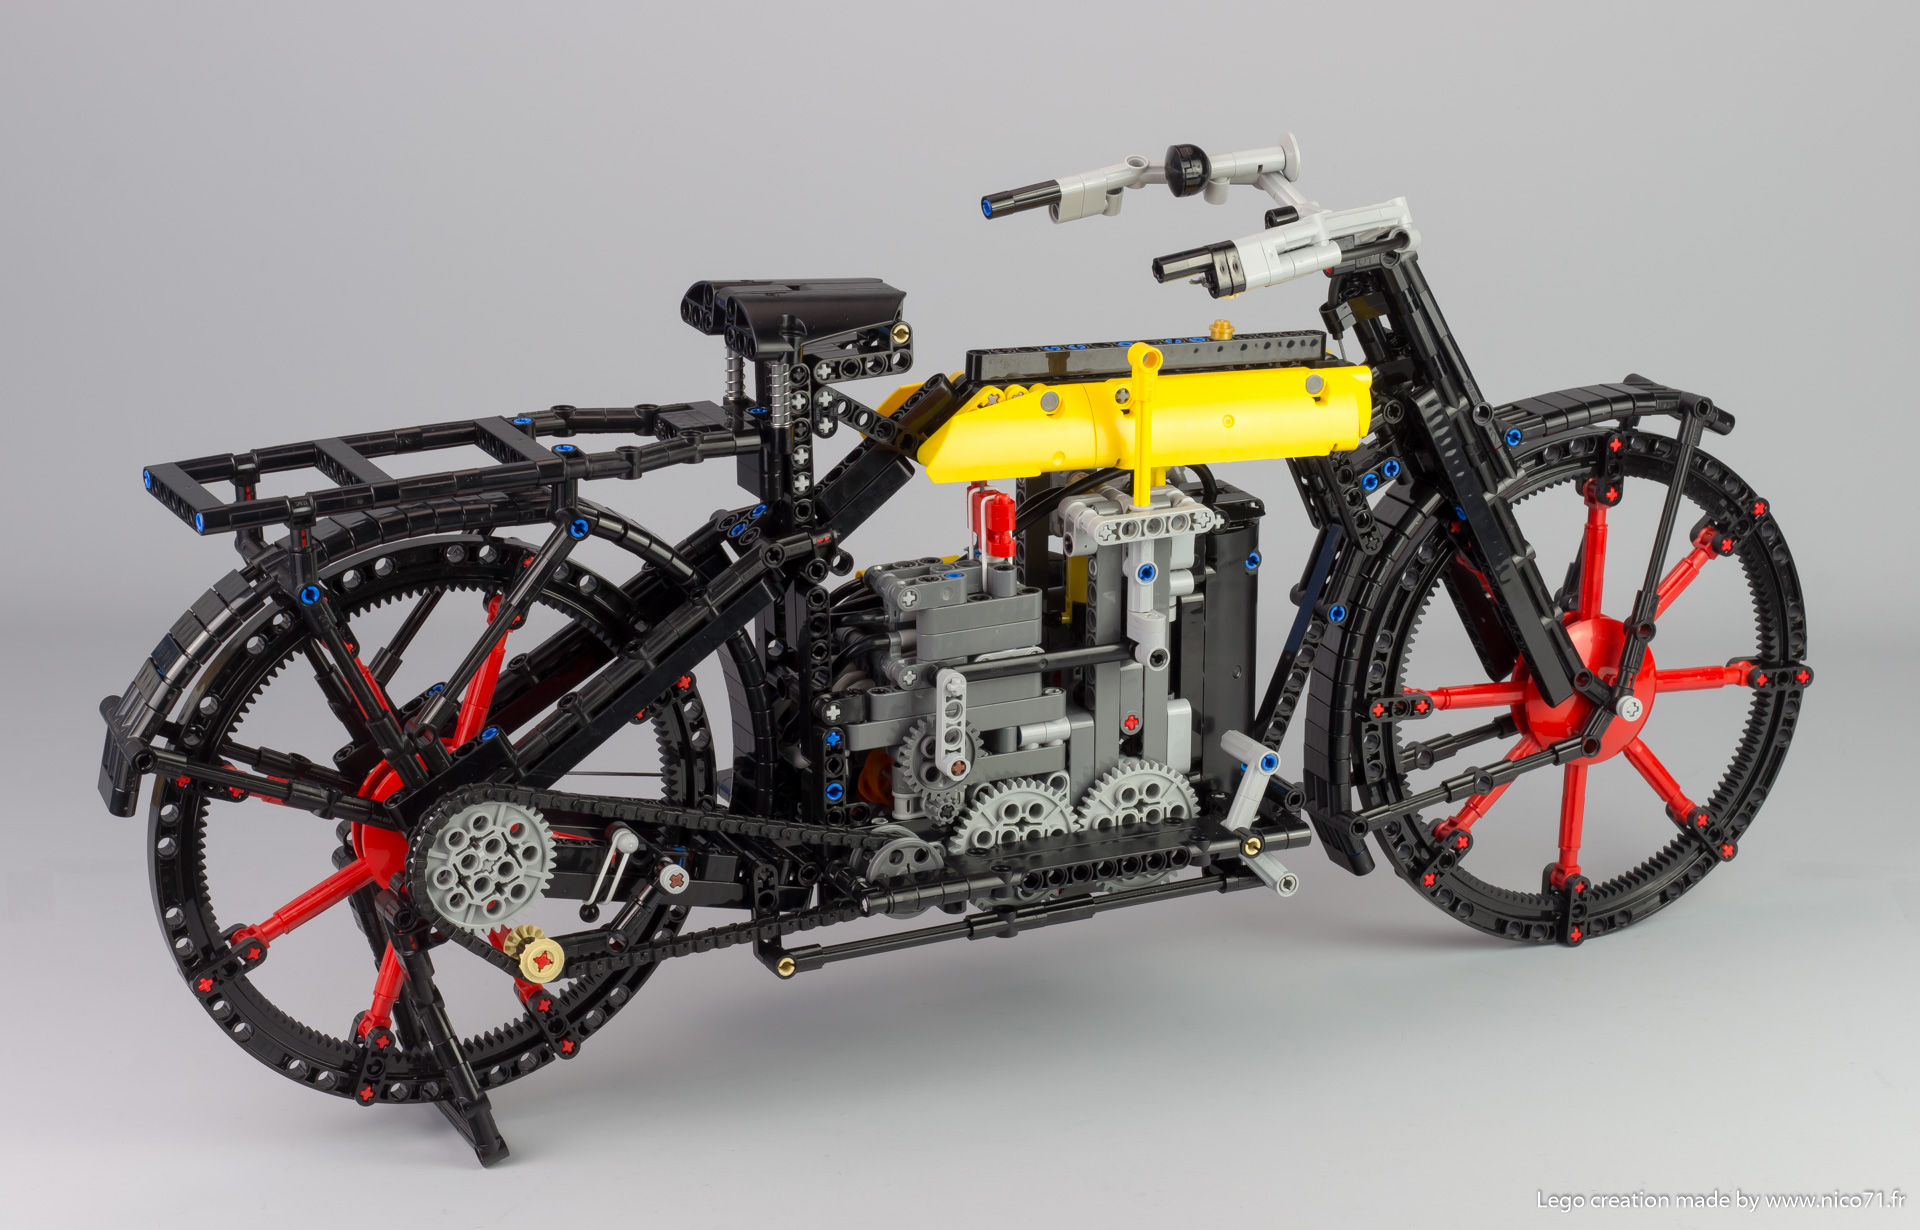
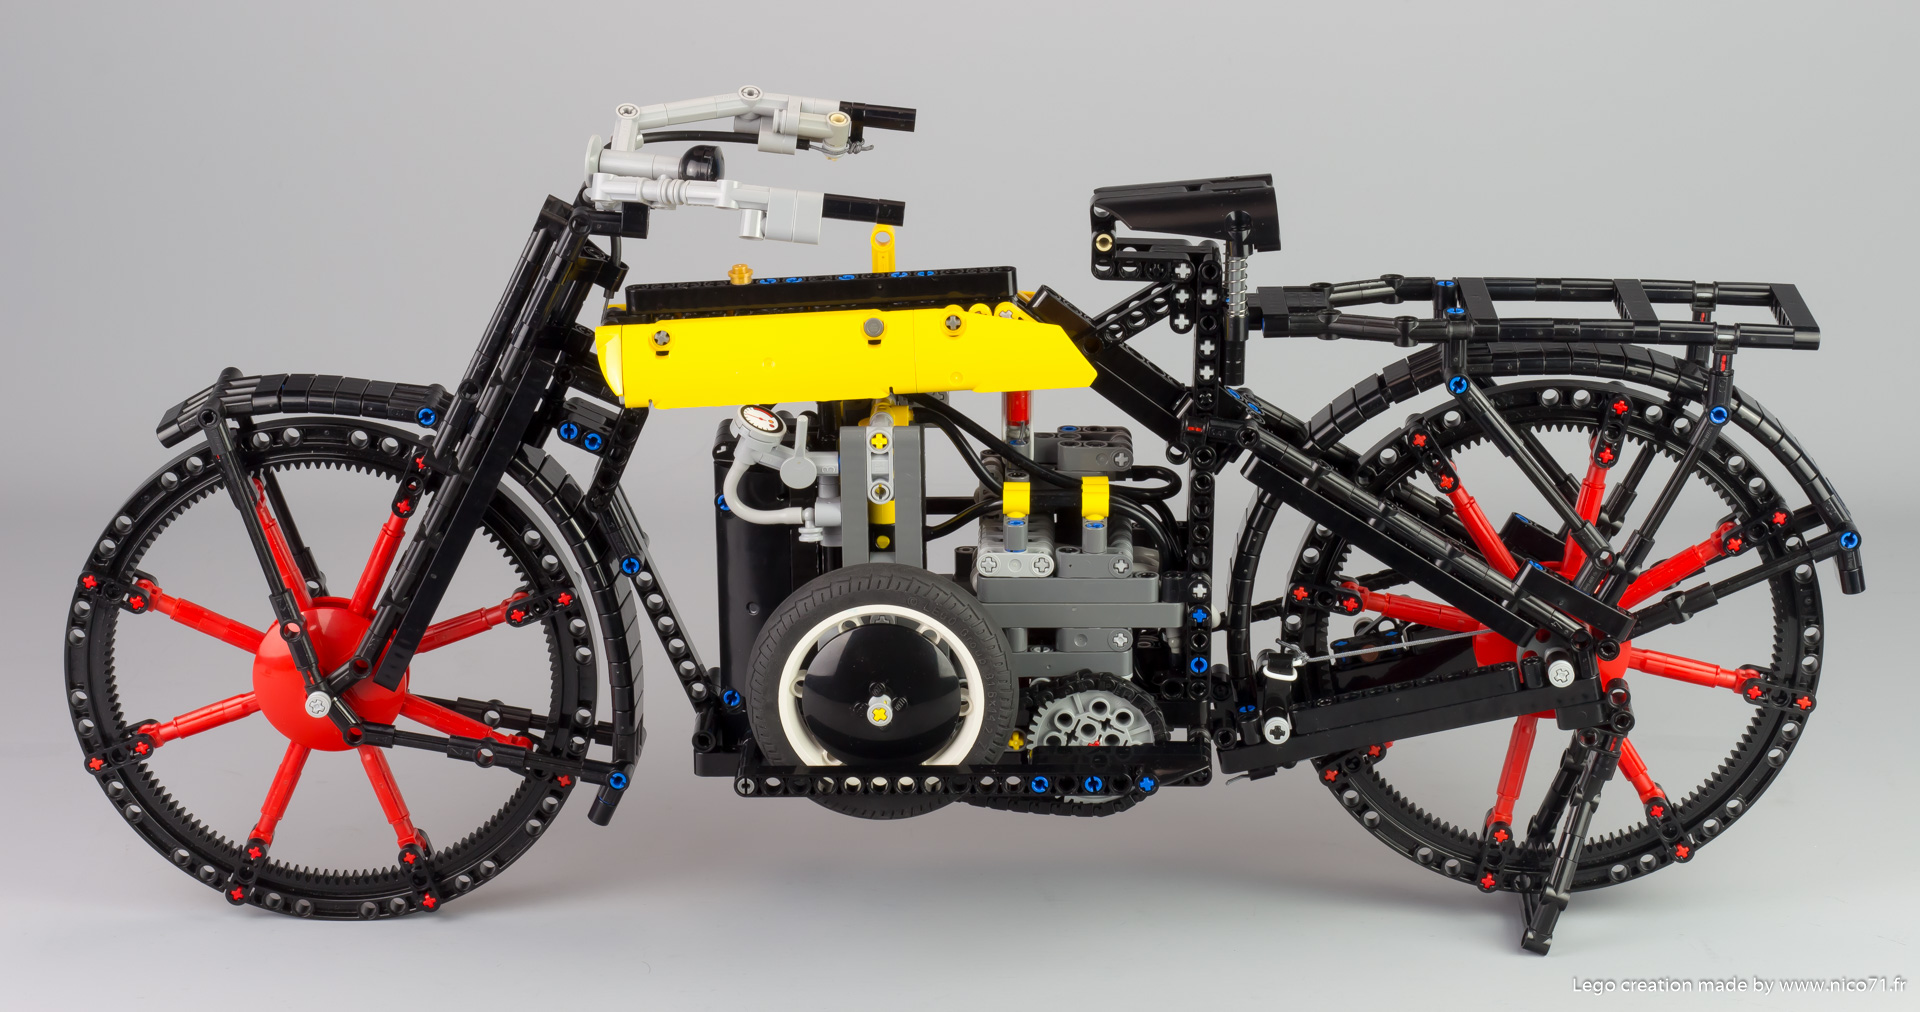
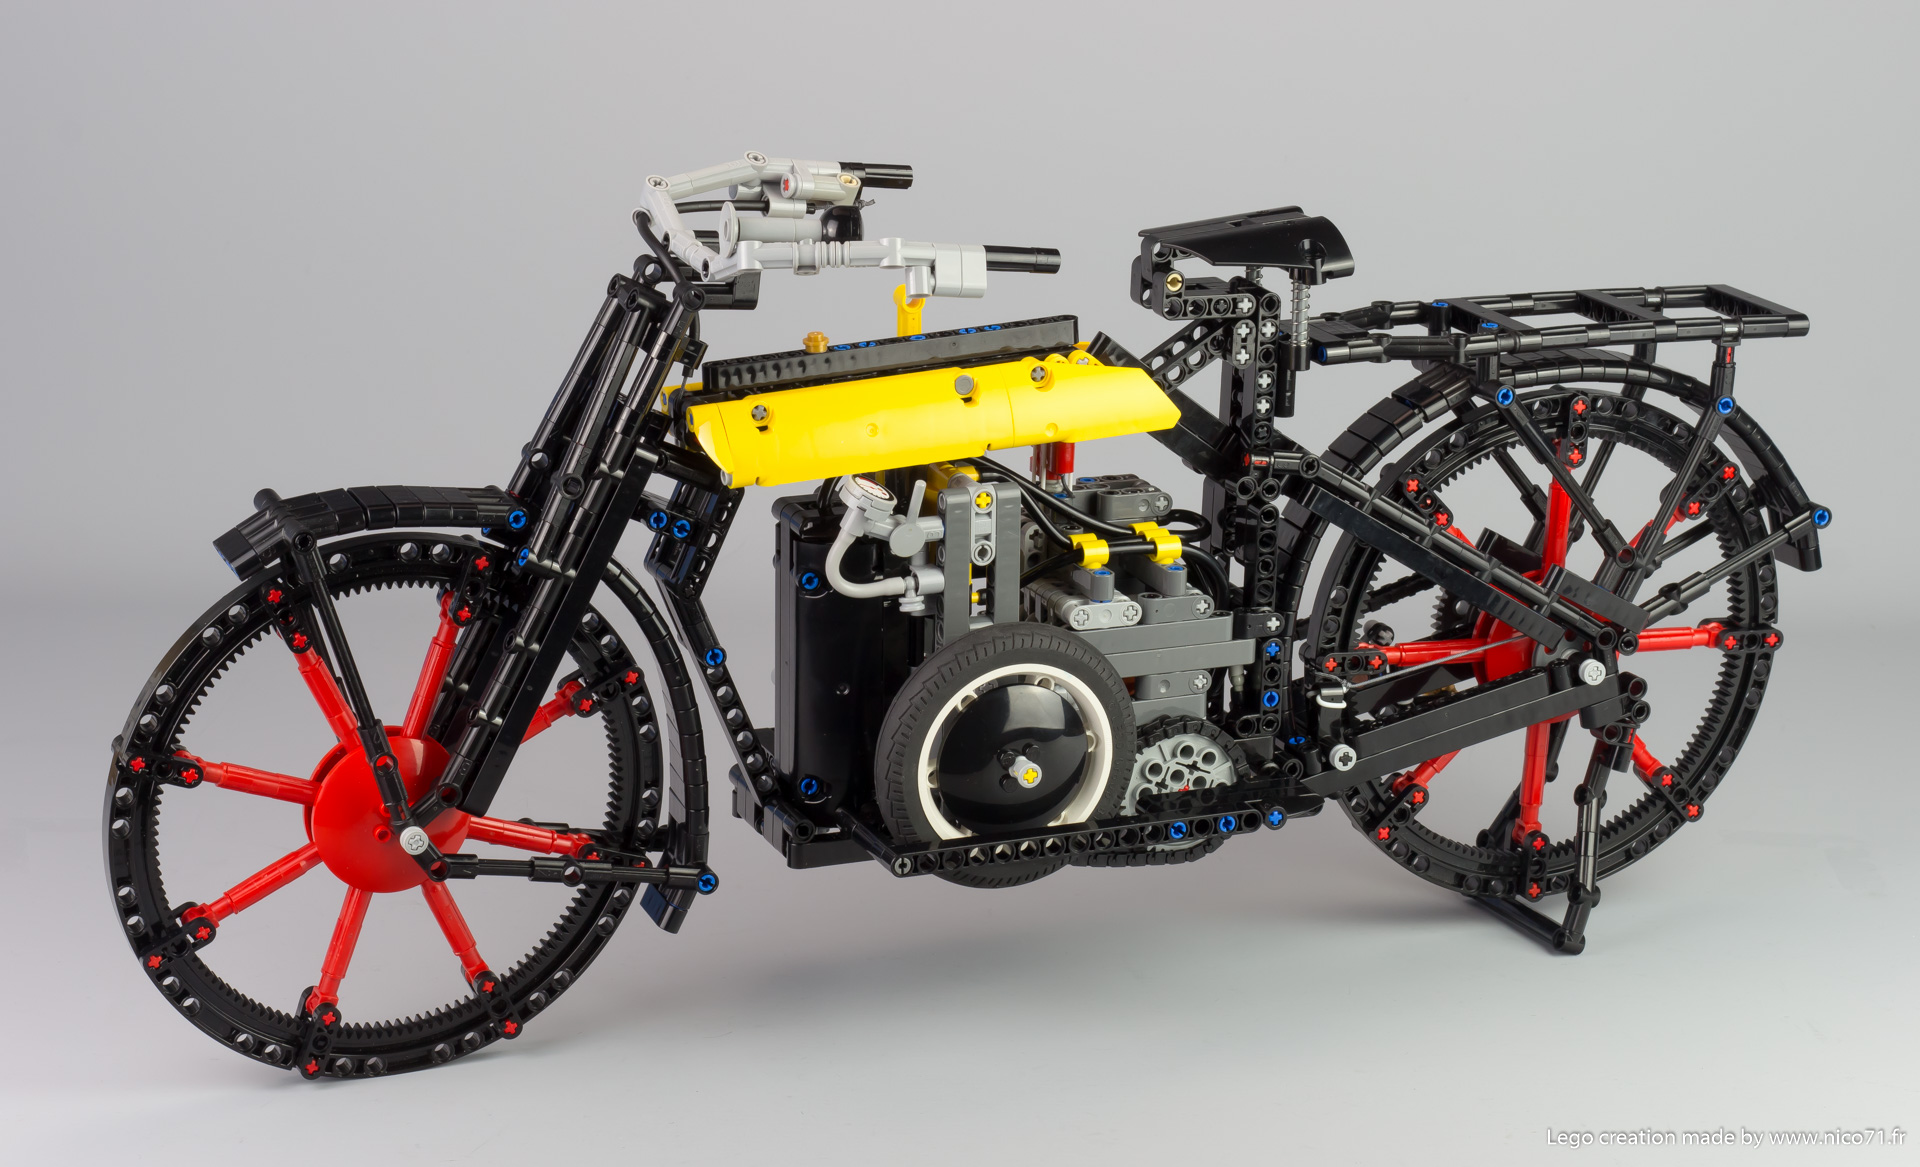
A steam bicycle, powered by a Switchless Lego Pneumatic Engine. Features steering, transmission with a two speeds gearbox, rear brake and working throttle, with building instructions.

Direct purchase of the instructions

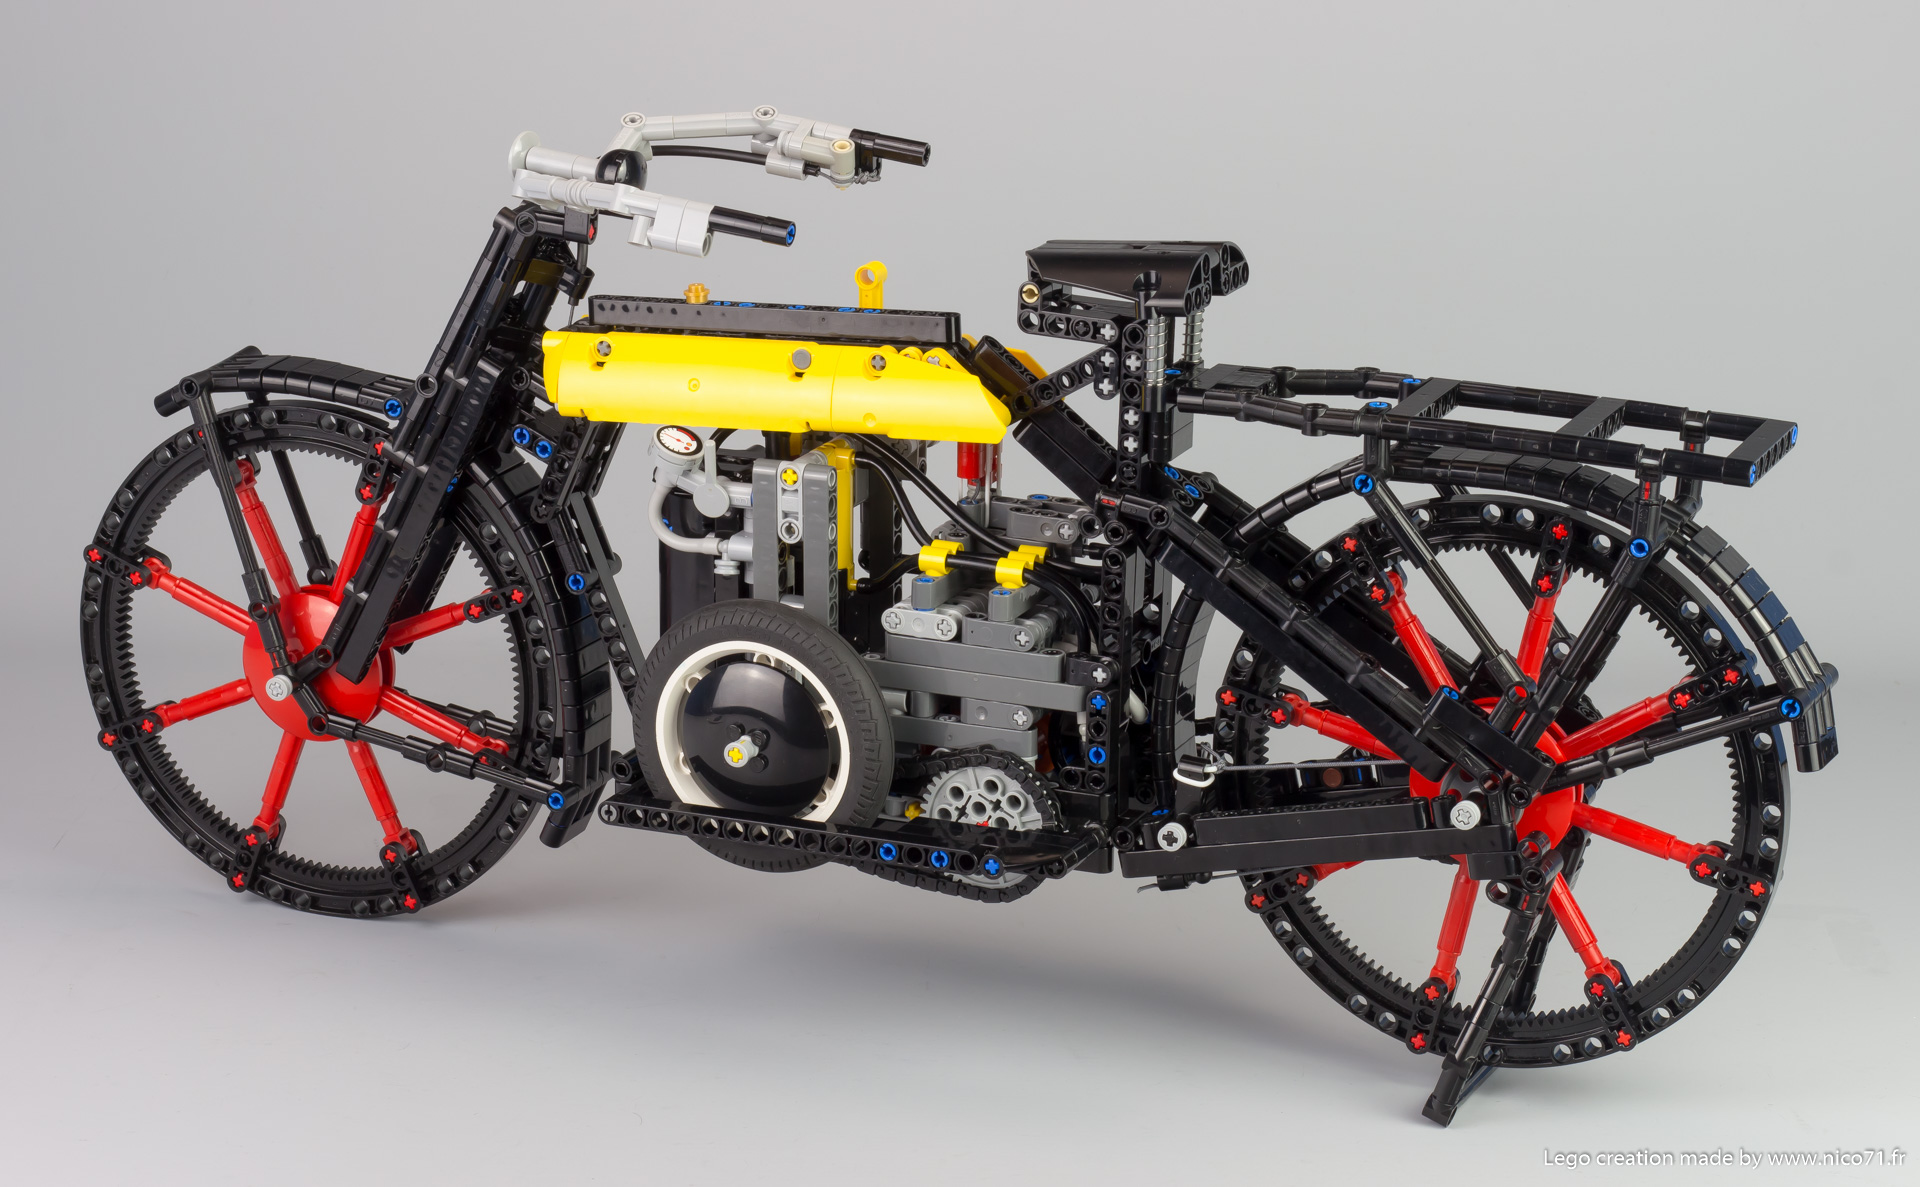
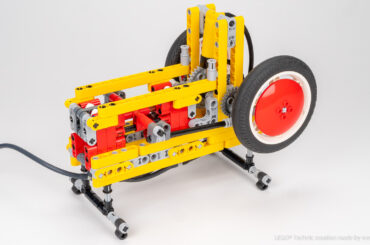
Steam Bicycle (Pneumatic)
Preview of the instructions at the end of the article.
Context
As written before in the article of my Switchless Lego Pneumatic Engine, I wanted to create a pneumatic engine which can run without switch to avoid the hard deadpoint and enables people to build a functional engine without modifying parts. I have created a functional prototype and then I wanted to improve it to install in a creation, here is the result.
Functions
The main difference between classic engines and this one is that I used pinched hose instead of switch. Rather than pinching the hose in the diameter (which require lot of force), I create a loop with the hose, which is tightened more or less with a pusher. The pusher is then connected the the crankshaft to create the distribution on the two chambers of the cylinder. The main advantage is it requires less force to operate the switching of the chambers but need continue air flow. You can watch in detail the principle of functioning of this engine here.
This single cylinder engine is based on the same principle, but rather than having sliding head-to-head pusher, I use independent pushers which are controlled by roller cam. This solution have the advantage to be more compact, have a better air timing distribution and less friction thanks to the roller. The gearing between the crankshaft and the cam is made with two 40-tooth gears, which enables a fine tuning. Then, the motion of the crankshaft is transmitted to the gearbox with a chain and is operated by the level on the right side thanks to a rotating gear shifter. An additional flywheel on the left side helps to increase inertia to make it run smoothly.
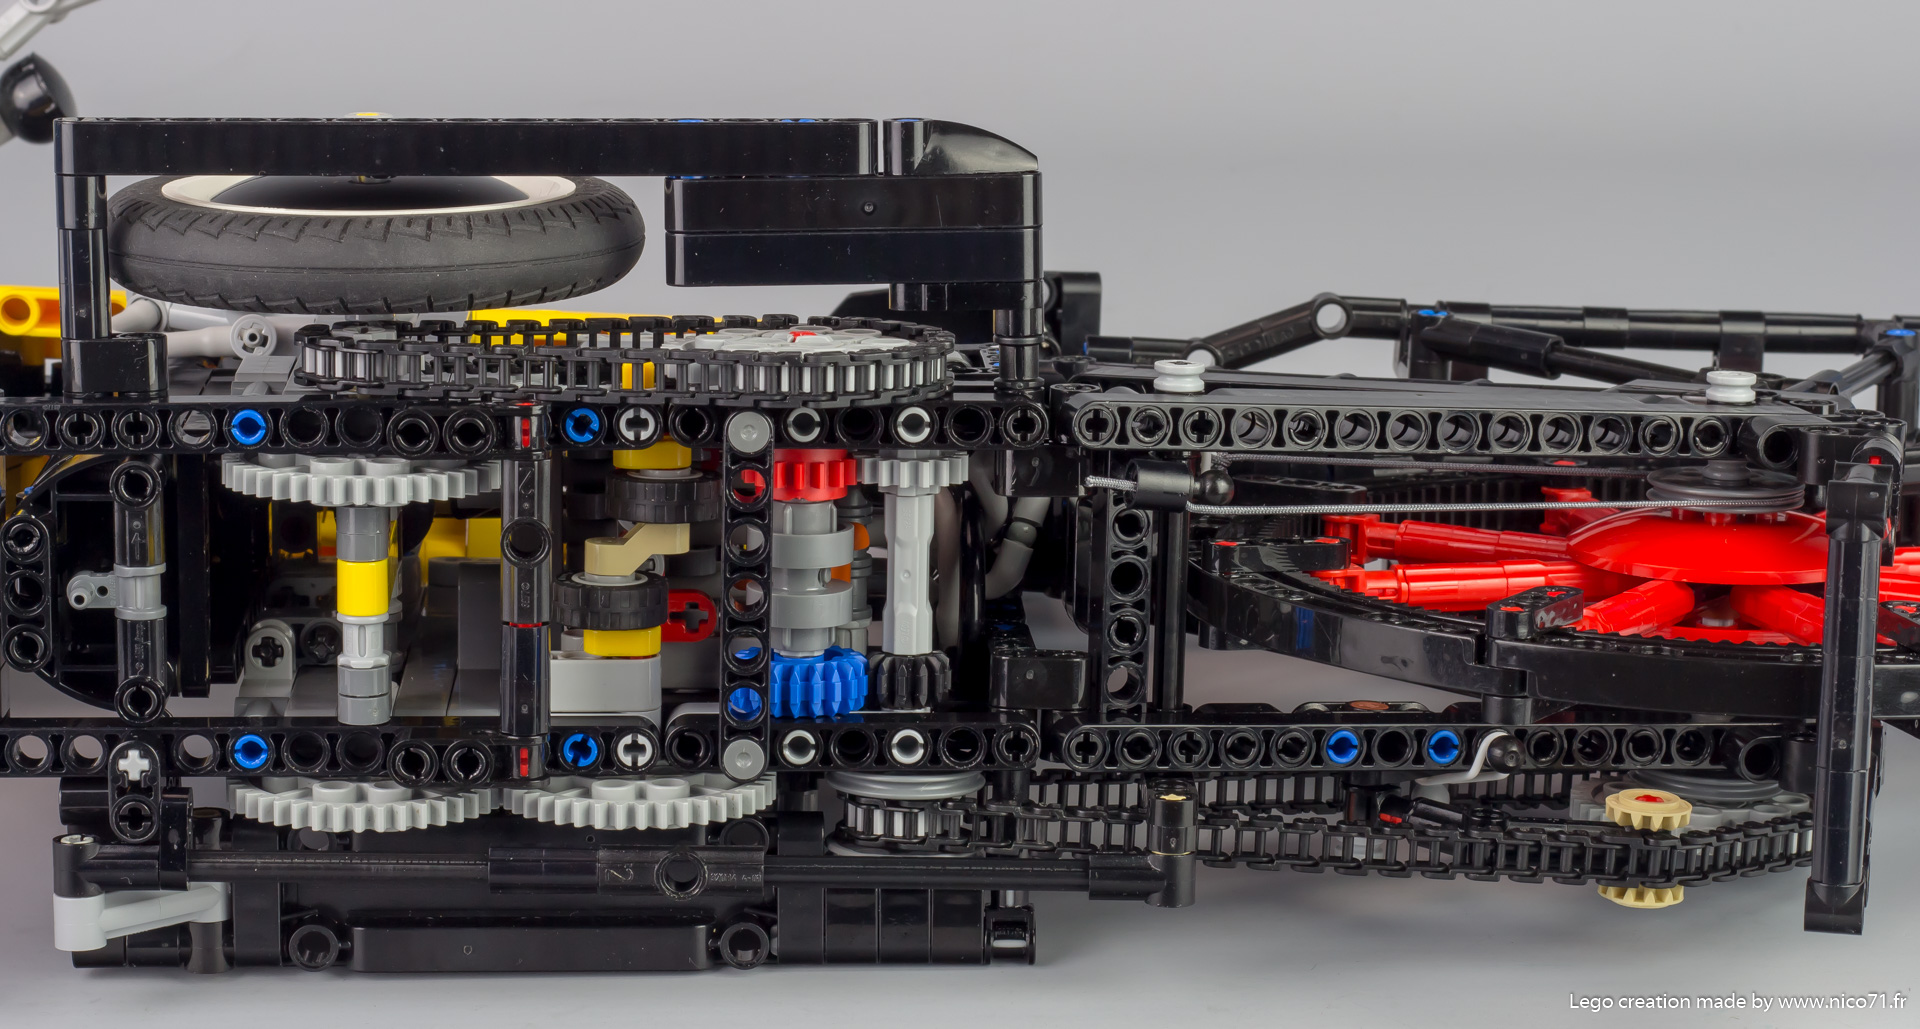
The bicycle is equipped with a working throttle. To make this function, I have used the same principle as for the valve (tighten loop for pinching hose). Two rubber bands keep the pusher in down position which block the air and a rope is attached to it and to the throttle by passing to a 3mm flexible tube .When the throttle is rotated, the rope is pulled and the pusher raised, which open the air flow which make run faster the engine. The idle can be control by setting the rest position of the pusher.
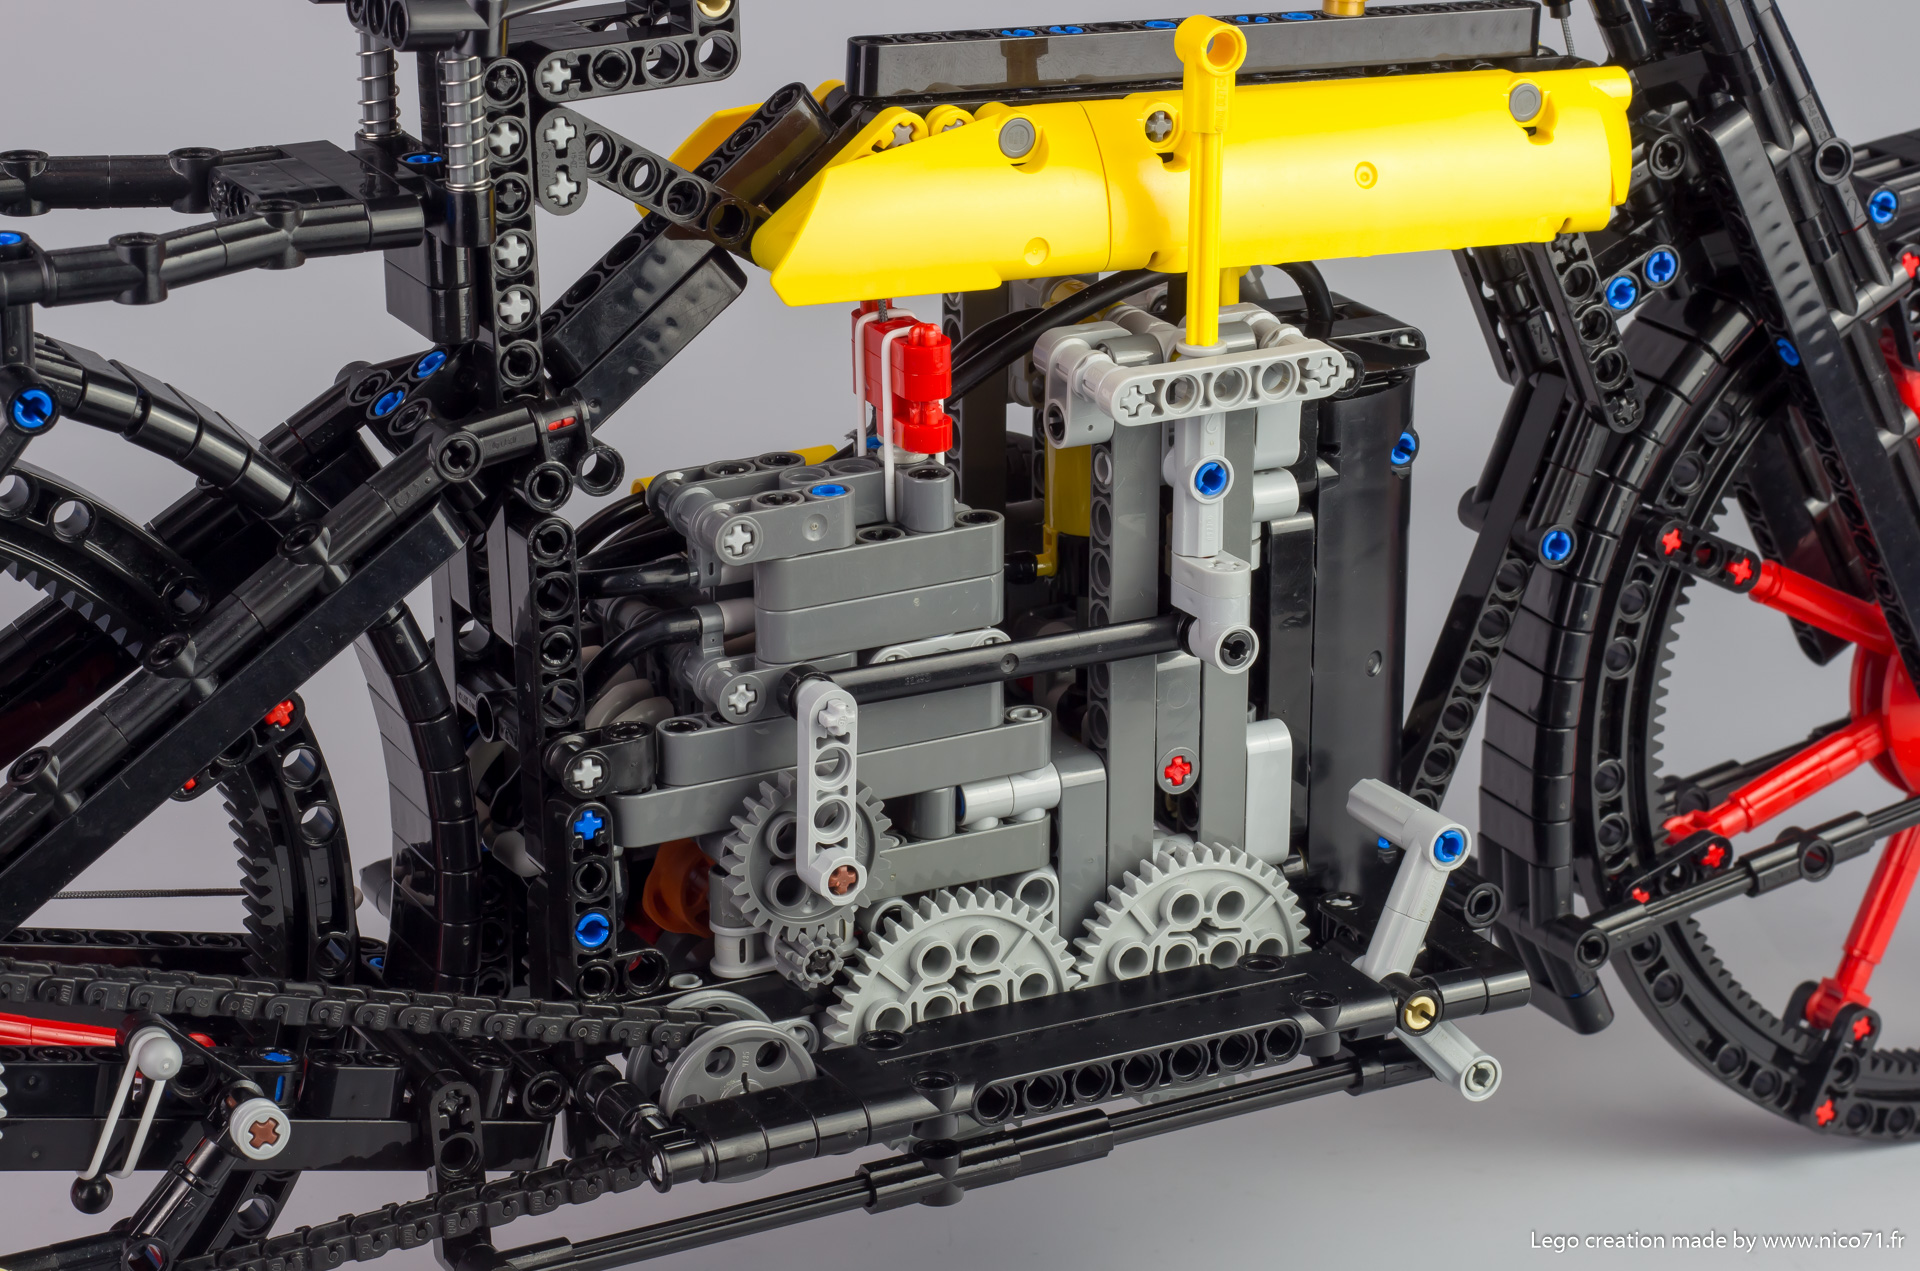
The last function is the foot brake at the right side. This is more a “speed reducer” than a break. It uses a rope attached to the chassis though a rubber band and pass around a pulley on the rear wheel. Then the other extremity is pulled by a lever connected to the pedal. The rubber band enables a return to the rest position with a small tension (if not it goes off the pulley) without too much friction. I would like at the beginning to make a front brake too but it was too complicated as the outer diameter of the wheel is not contact due to the way the spokes are attached.
Design
The heart of this creation was the engine, but of course I tried to make a decent looking. It comes with colour choice to highlight the engine with black frame, yellow reservoir and red wheels and a “steampunk” looking with the yellow colour and hose. I have also added some details like the package holder, mudguard, horn, gauge, spring loaded saddle, stand etc. At the final, I am very happy with the design and details despite the lack on rubber tires and I think the functions are part of the design this time, with a nice looking sculpture which can run (but of course not drive).
Performance, Pictures and Video
The performance are quite good considering the purpose of the engine : to be built with non modified parts at a standard running air pressure (3 bars). It runs fine and can achieve good speed (nothing compare to a modified LPE with thousand RPM) and accept to run low too. But, it has also drawbacks linked to the heart of how it works.
The first is the hoses used for the 4 loops which make the distribution (4x 9cm lenght) : they have to be soft enough to have an easy pinching and strong enough to handle the pressure. For instance, the last hoses in the 42100 are glossy and hard to pinch, the very old pneumatic hoses from 90’s is too soft for me and do not handle the pressure. The ideal hoses are those which come from the sets from some year like the 8436, or the 8455 (mine comes from this set), you can use also the hose from the 8110, 42043 if they are not the glossy version. You can use other hoses but you will need to increase the pressure if the hose is too hard to pinch and reduce if it is too soft (with of course limits). As I have not tested, I can not certify it will work with every hose. Blokbricks alternative hose has been tested on a smaller engine and works fine. They can be purchased in meter.
The second drawback is that the air flow and air pressure affect the required pinching force and then affect the functioning. The air flow have to be constant to avoid the problem of running, that is why I do not recommend to use it with Lego pump and/or airtank (like this one) but rather an other source of air like a compressor / pump with a air reservoir which enables to have a constant air flow (not in the instructions nor the bil of material). The LEGO Hand Pump works but the functioning is jerky. The air pressure is less sensitive but I notice it runs the best with the hose I have between 2.5 to 3.5 bars. Less than this value, the engine has not enough power to run and stop, and with more pressure, the hose do not handle the pressure.
I have not seen any wear on the hose, even if they tend to keep the shape of the loop some time after dismantling, they recover their original shape without any leak or damage after some time. But I think it can be damage if they rest for a long time on display with no pressure. So if you display this creation, remove the upper pneumatic T connector assembly to loosen the loop.


Building Instructions
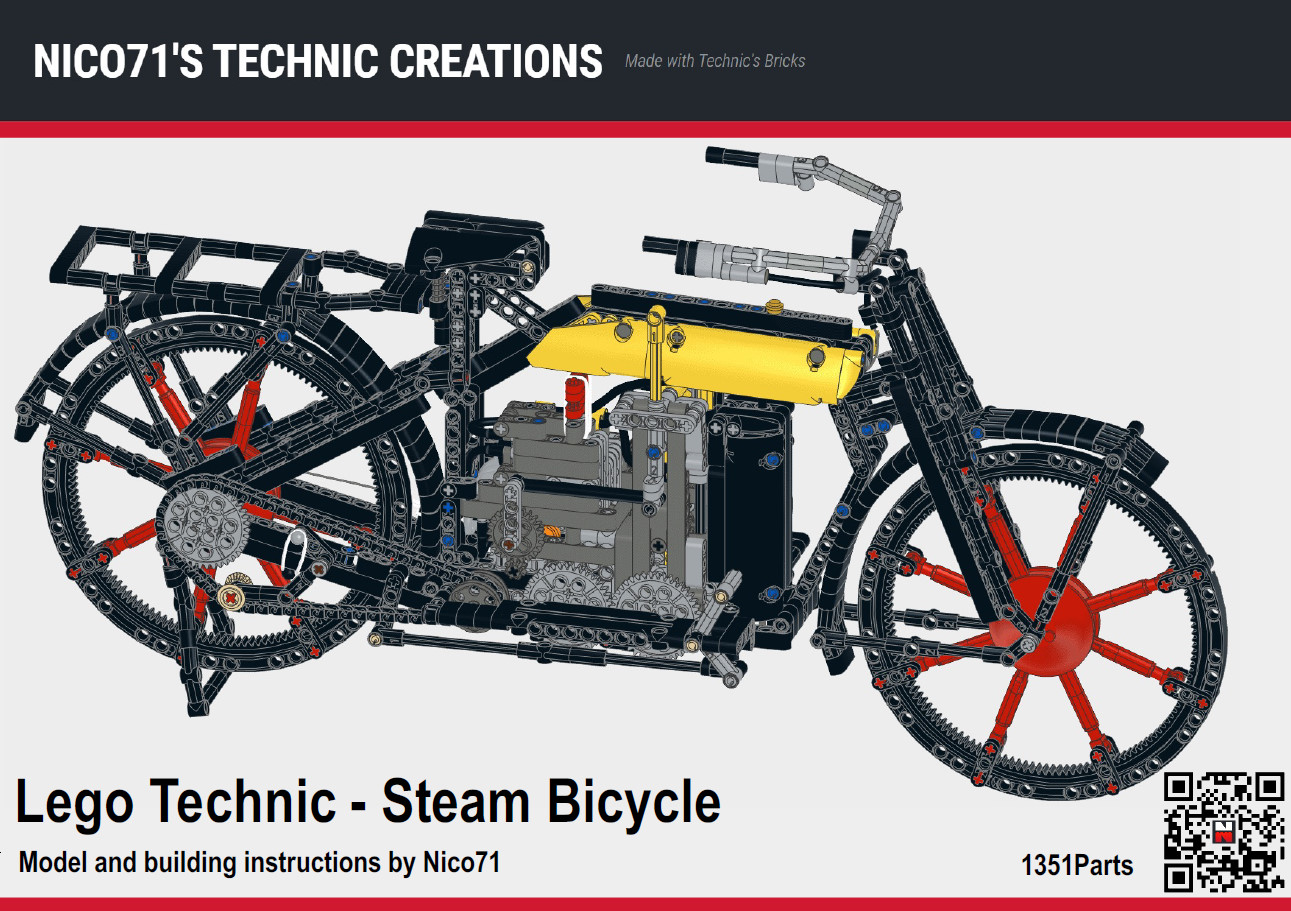
As this engine is a new way of making Lego Pneumatic Engine, I have made detailed instructions in order that you can rebuilt it easily. The instructions are step by step high resolution computer generated instructions with step-partlist in the same way as official Lego one. It also includes every rubber band, ropes and flexible parts drawn plus important dimensions for specific elements to build and set up.
You can checked the bill of material on Rebrickable and export in whatever format you want :
You can buy the instructions for 10€. You can also buy other building instructions and get an automated discount. You will get 15% off for 2 PDF, and 20% off for 3 PDF on the total), available for all the instructions for sale on nico71.fr.
See it on the shop :
Steam Bicycle (Pneumatic)
After your payment, you will be redirected to a page for downloading your instructions, and will receive also the link to download by email. Please check the spam box and be patient to receive it. If you have trouble to download your copy of the PDF after payment or open the document, do not make a paypal dispute, please contact me using the contact form. The link to download the instructions expires within 24h. Contact me if you have lost your instructions. Note that you can print it, but not copy or distribute. Thank you for supporting my work 🙂
Here is some preview of the building instructions :


How To Set Up
Lego Pneumatic Engine is hard to make it work without previous experience. That is why I have made a video to explain step by step how to set up, how to choose the hose, and which part and placement are important. Please watch this video before buying the instructions and please consider that your engine can not run at first time and require fine set up. It is better if you have already an experience in building and setting Lego Pneumatic Engine. You can contact me using the contact form if you have trouble to make it works.
Please note that you will need to have you own source or air (3 bar / 40psi). You can use :
- 4x pump lego like this one
- Use a lego compressor according to the specs
- Use a electrical compressor like automotive compressor, industrial or electrical pump, you will need to put the air in the lego hose with . You can use a ball needle.
- Use a hand pump with ball needle.

(4) Comments
Hello, thanks for your comment. You can see the needed parts on the link on rebrickable in the article. You will see all the part and can export in a wanted list for bricklink or you can click on buy option to find a store who have all the parts but I recommend to use the option multi buy to make multiple order to decrease the amount. You can search for tutorial “rebrickable multibuy” and “how to buy on bricklink with wanted list”. Nico
Wonderful work …can I get the list of parts requires to build this model , as I dont have any parts, so please guide me how can I work on this model and from where I can source the parts for the same , thanks in advance
Thanks ! You can not buy it, but you can buy the instructions to rebuild it 🙂
Excellent. Want to buy
Comments are closed.