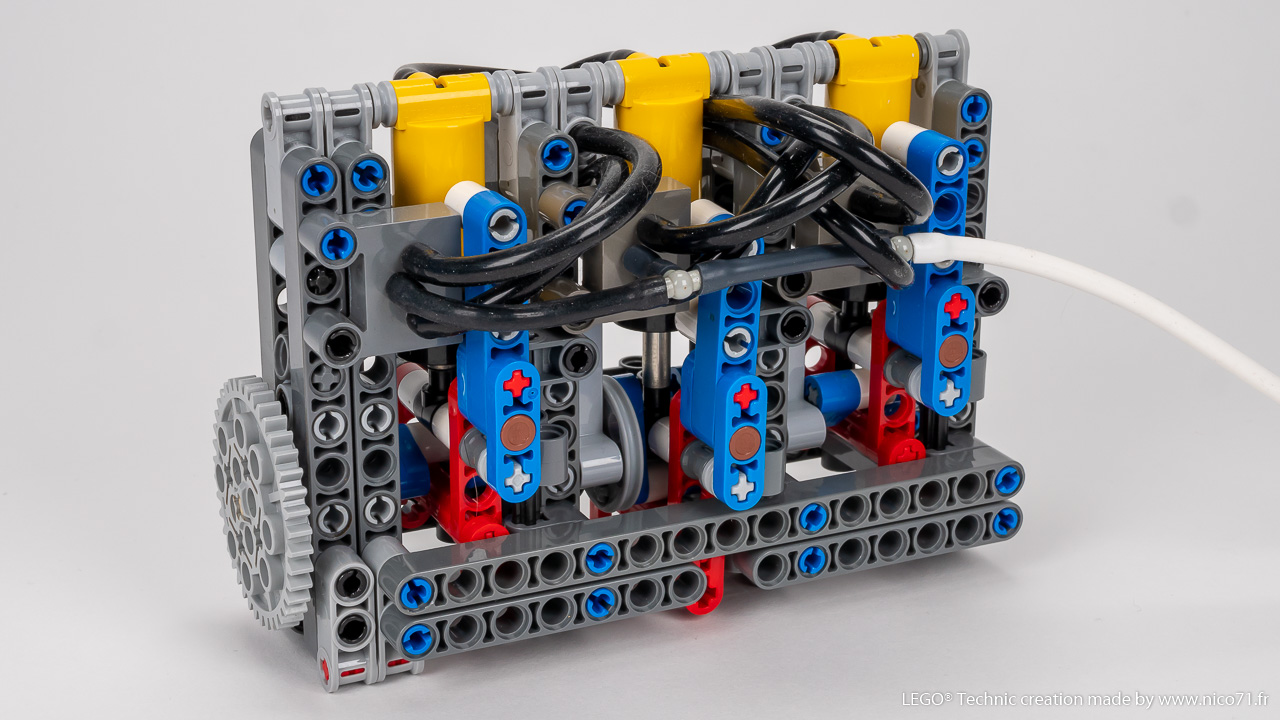
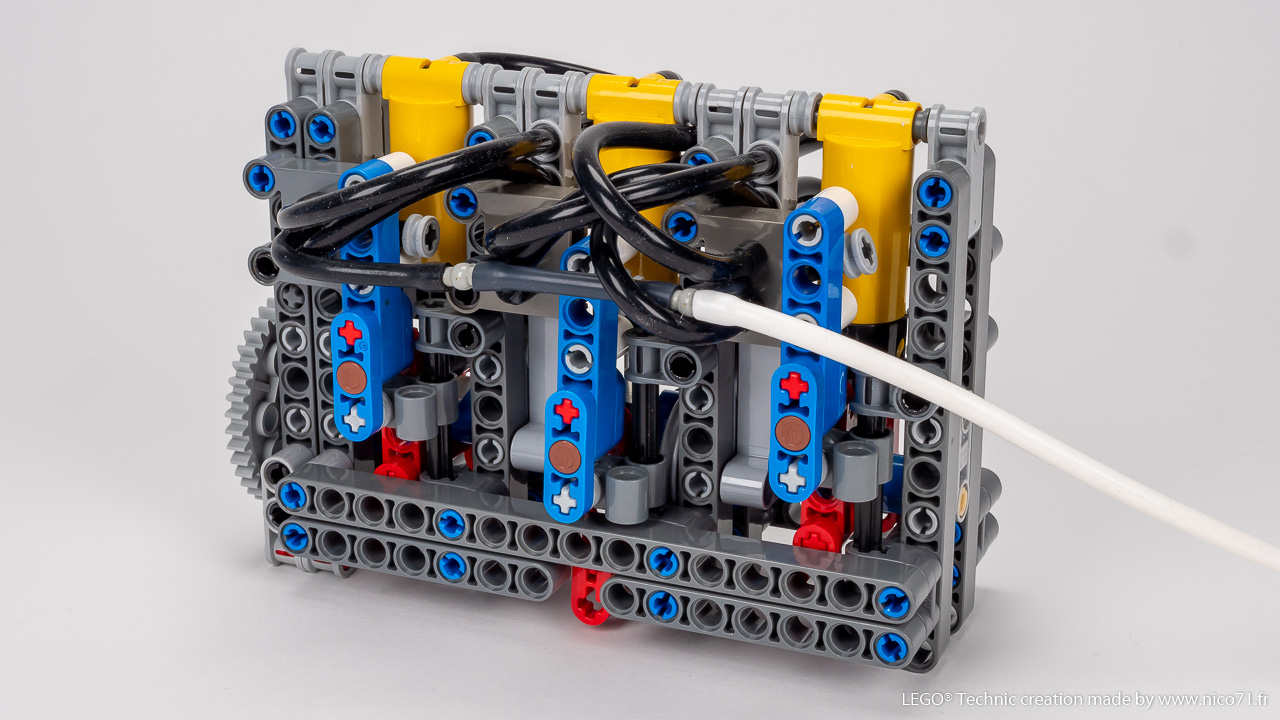
My version of LPE3i based on scotch yoke system (original ideas from LPEpower) but with new switches ! It works smoothly at 200RPM with 4 hand-pumps and without friction (thanks to the scotch yoke).

The major problem when designing a Lego Pneumatic Engine (LPE) is the dead points of the switches. In deed, the switches are the most important parts with the cylinders, they enable the engine to distribute correctly the energy (air-pressurized) in the cylinders. The problem is when a switch is on its dead point, no energy enter or no get away from. The result is consequently a blocking during the rotation of the engine.
There are different ways to reduce the dead point (evaluate at 30° of a complete revolution of the crankshaft). The first method is to use a inertia wheel also called flywheel in order to give enough inertia to the engine to break the dead point(s). The problem will be then the vibration at high speed (amplify by the mass and inertia). The second method is to modify the mechanics : for instance with the scotch yoke instead of the classic connecting rod which reduces the dead points.
The third factor to consider is the number of cylinder. For instance, a 1-cylinder engine can’t start itself without flywheel. Two or more cylinders is necessary to have a automatic start but you must set up the crankshaft at 90°. If you set up the crankshaft at 180° (in classic real explosion engines), the engine will not start by itself, again because the Lego parts have not enough inertia. If you want more than 2 cylinders, be aware that a lot of cylinders will generates lot of friction. That is why, a configuration angled at 60° with 3 cylinders is a good compromise to start with.


Building Instructions
See it on the Shop :
3-Cylinder Pneumatic Engine
Designed in 2009

(15) Comments
Yes If you change the whole design of structure.
Does this work with pneumatics from 42043?
[…] Building Instruction of the engine : http://www.nico71.fr/lpe3i/ […]
Are the pneumatic parts (cylinders and switches) in this engine modified or original? How much faster/better do you think this engine would work if I build it with modified parts?
[…] Instructions by Nico71 under Lego Pneumatic Engine Here are the new building instructions of the LPE 3i with Lpub and thanks to Ansgar […]
Hi,
I sent you an E-Mail, with a zip-file attached, that contains the building Instructions. Unfortunately the file is pretty big – 11.4 MB – which is because I added Pictures rendered by MLCAD. If this is to big for your inbox, I’m gonna send you a zip-file without those pictures.
Hello, that is a great achievment ! Can you contact me by email to send me the instructions or the Mlcad file. I can add after the pneumatic hose. In any case, many thanks, to your contribution !
Hi, I have created a building manual for this great engine, using MLCAD and LPub. It currently does not feature the pneumatic hoses, but I’m planning on adding those soon.
Would you like me to publish those instructions here, or to give them to you, so you can publish them?
Hello, Read the FAQ please. Regards
Hello
Where can i get the parts?
Hello, sorry I don’t sell any part, but you can find all the part you need on Bricklink of at LegoDIRECT (call only).
how much would u charge for a set of 6 peunatic pumps and 6 peunatic lifts
No because each cylinder works with on other. I suggest you should try a single LPE with a flywheel to get enought inertia.
hi, nice engine. do you now of it can works in 1 cilinder.
i only have 1 pump en 1 cilinder
srry for my bad english
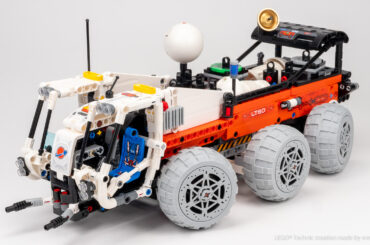
[…] Tractor by admin under Farm Equipment, Lego Pneumatic Engine A tractor powered by my LPE3i, features drive, gearbox and […]
Comments are closed.